Events
One of the main features of eventula is event management (like the name could already indicate, lol). If you went over to your admin panel you will see the event section on the left, there should be one test event already created. Lets get into how to delete it and how to create new events.
Basic
Delete an Event
To delete the sample event (or any event in the future) just click on Delete right next to it:
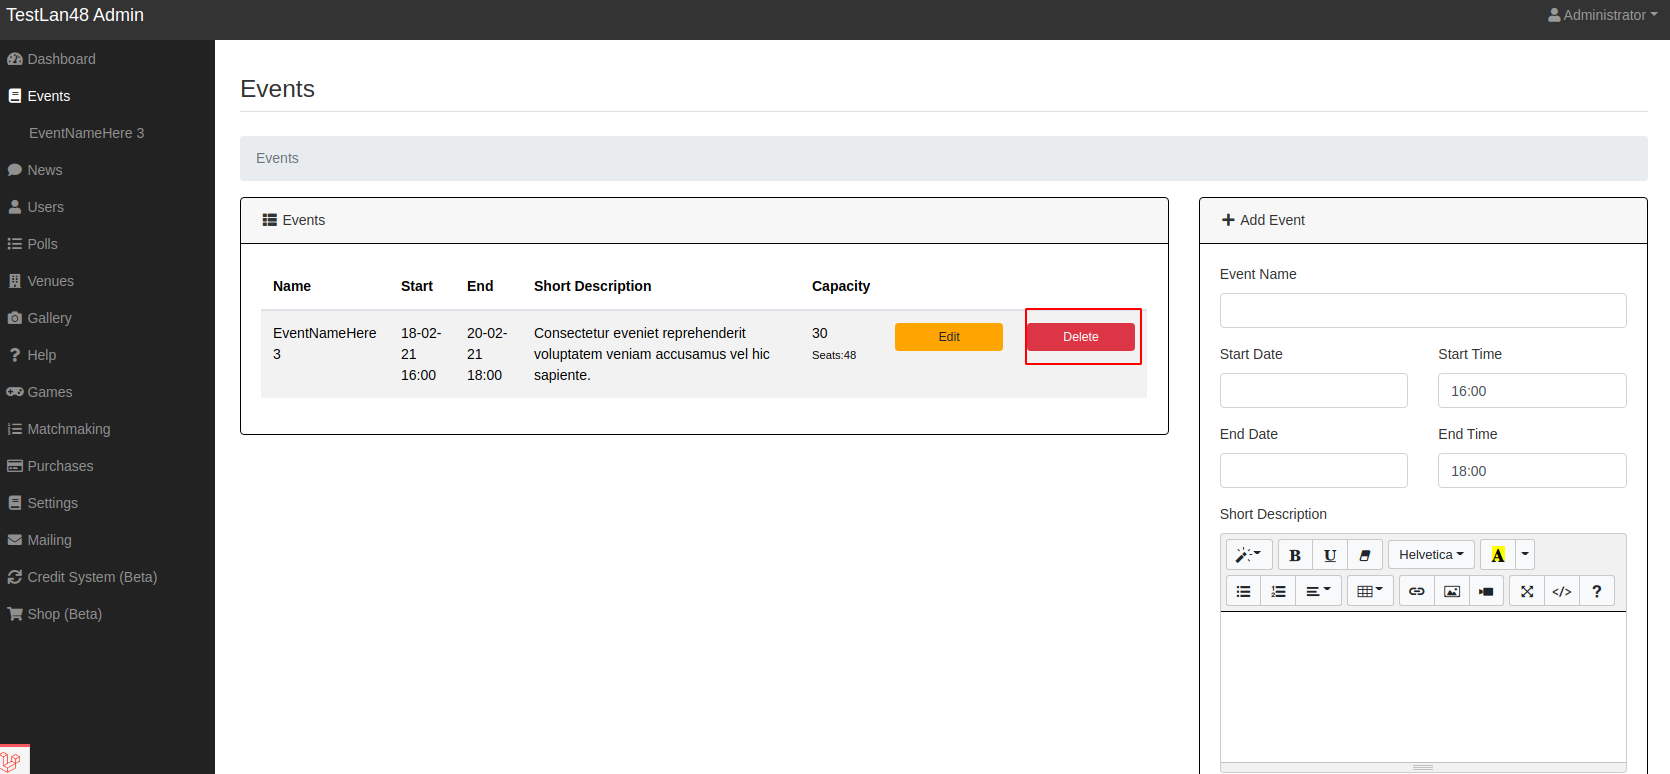
you will be asked to confirm the deletion.
Warning
Once you deleted an event all the associated data is gone! This includes all Ticket information and all tournaments. Please think about making regular backups of your database!
Create an Event
Warning
Before you Create an Event you might want to jump to the Venues Documentation and create a new Venue before the Event!
Warning
Once an event is created you cant change the associated venue!
On the right side you cann Add new events:
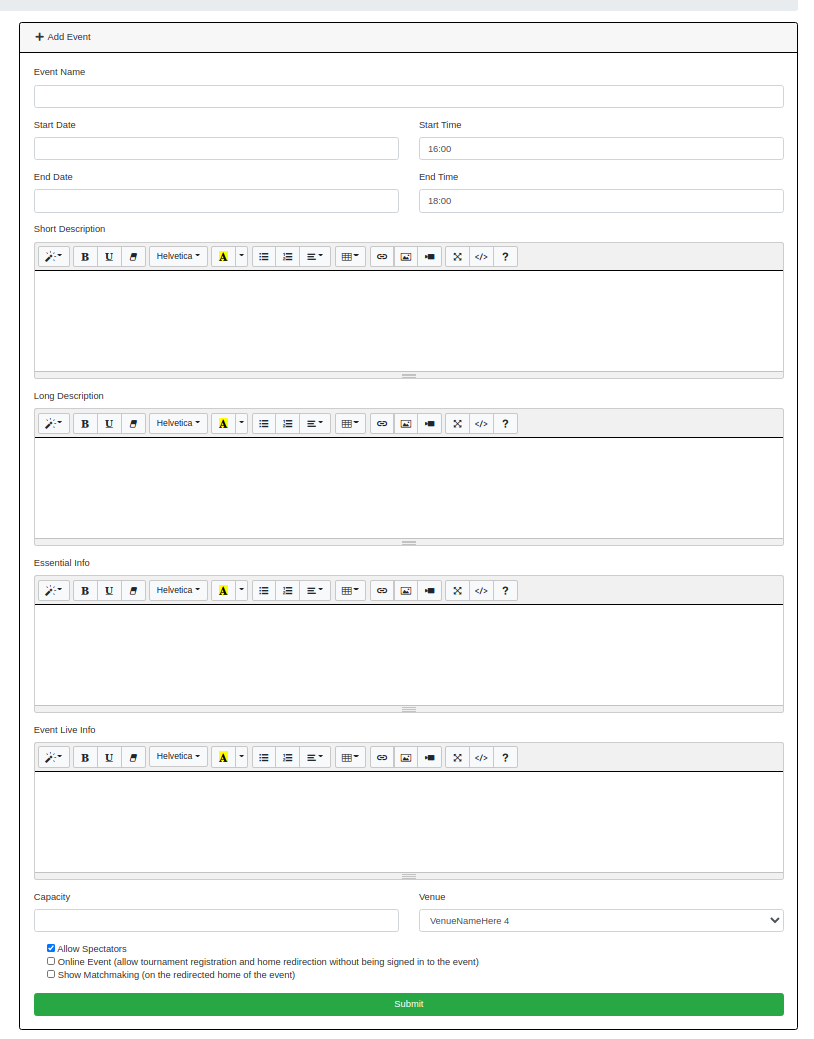
You have to fill everything except the Essential info and the Event Live info here to create the Event.
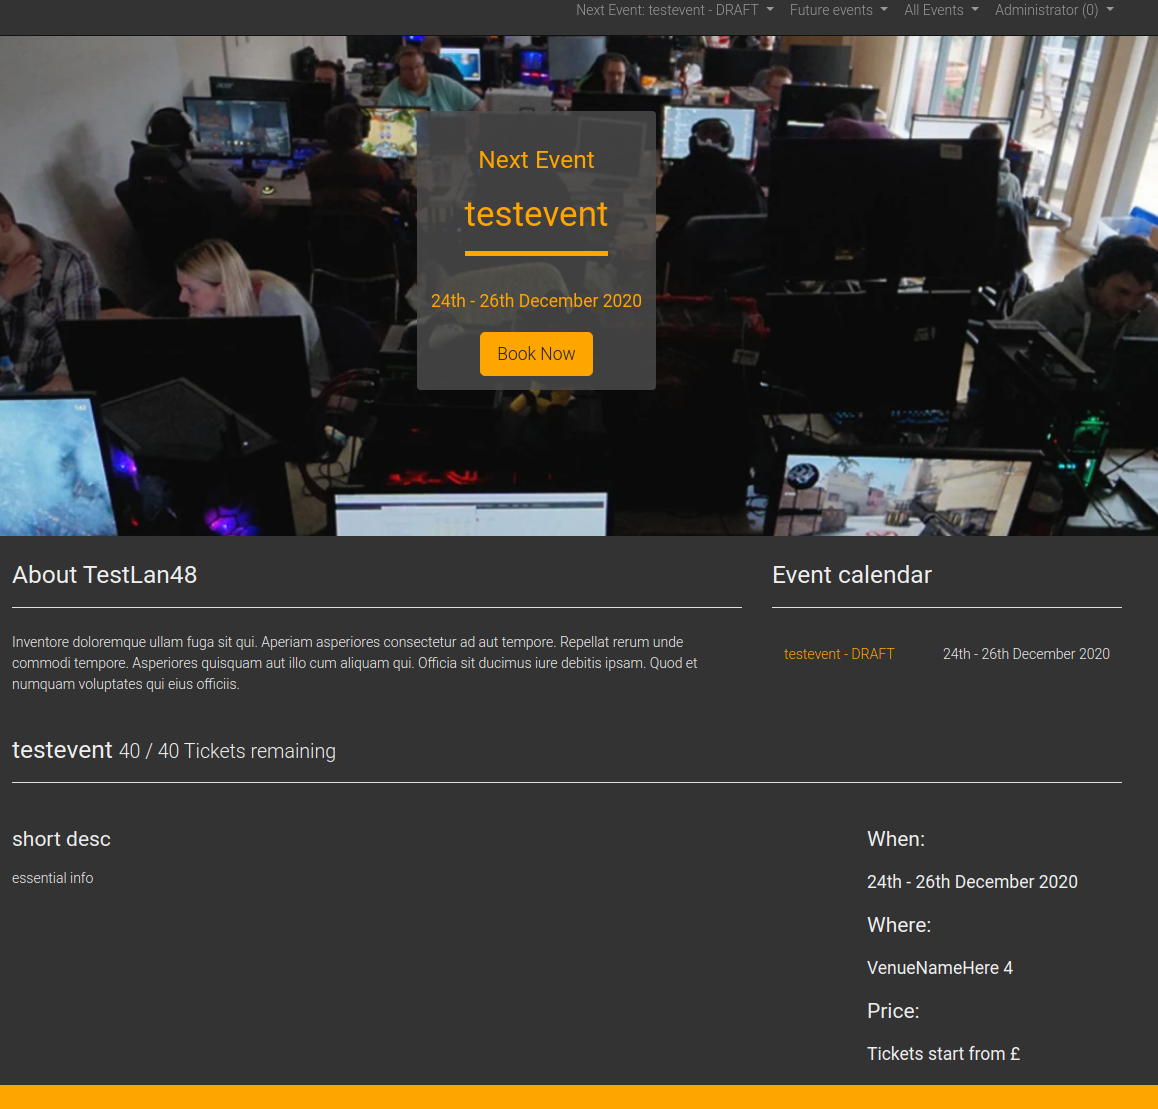
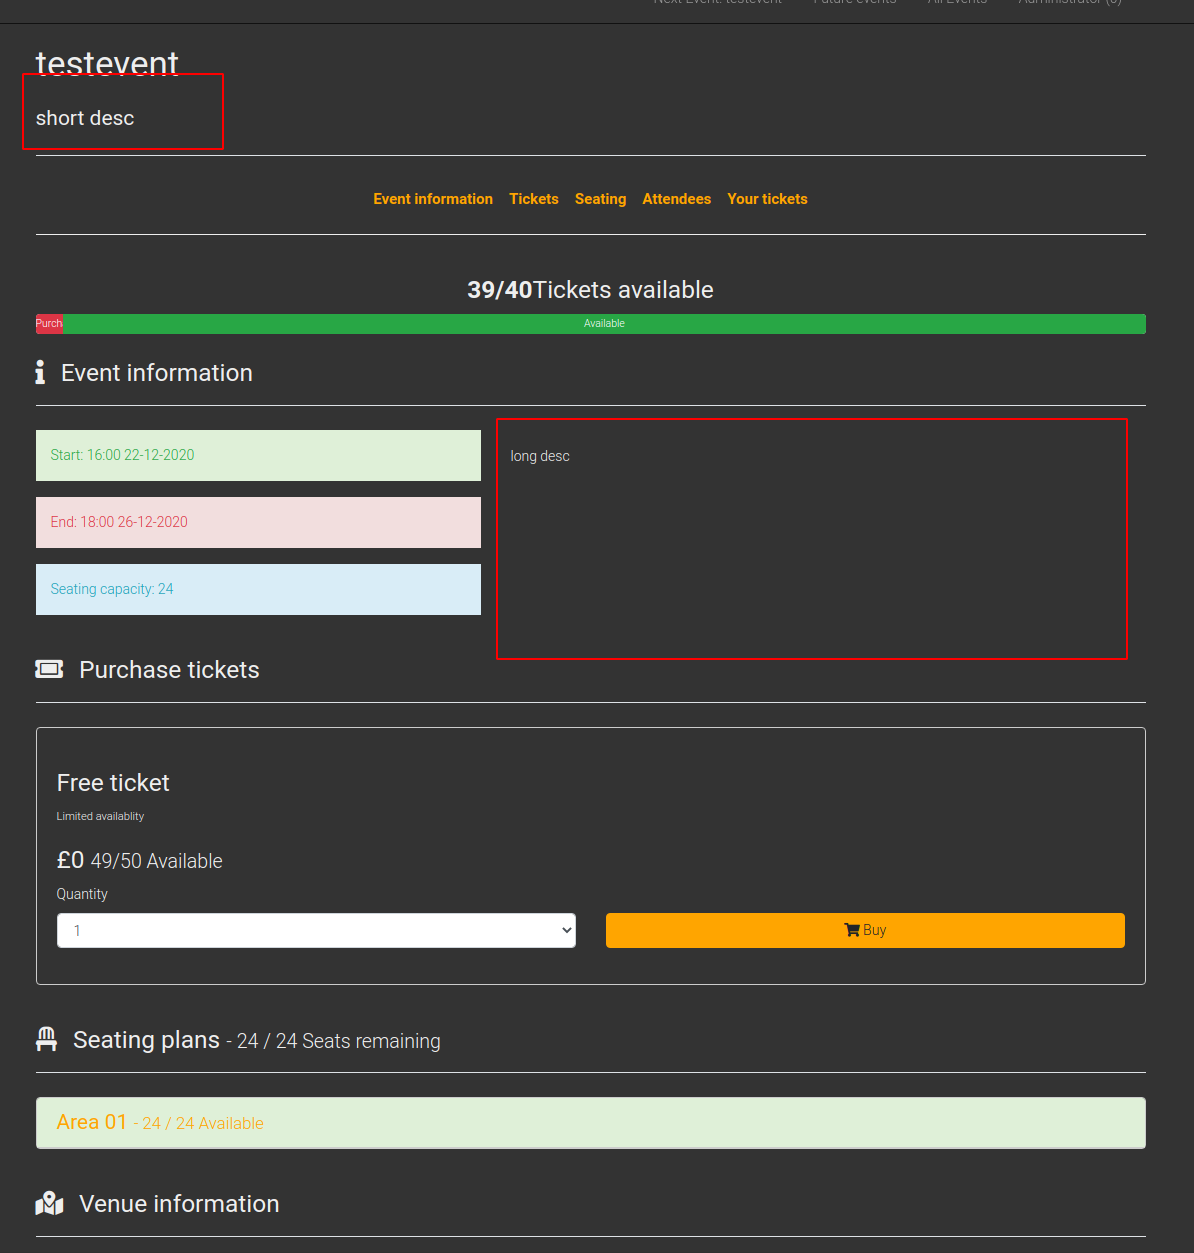
The short description shows up on the home Page , as well as the essential info:
Both also will be shown on the events/ page of your manager:
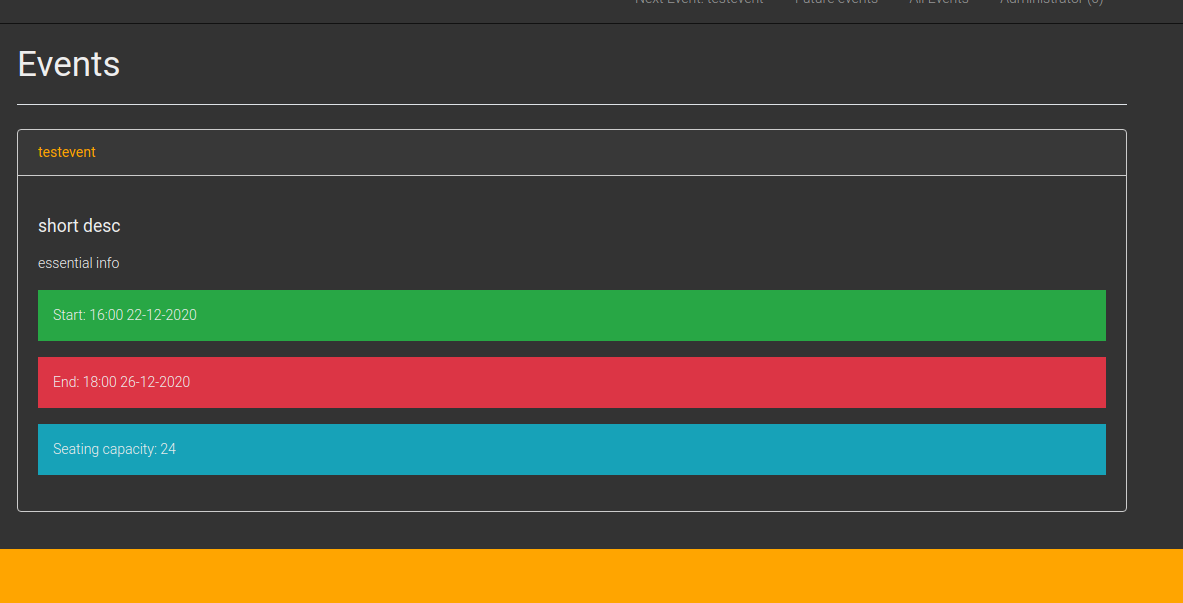
On the events information page the short and the long description will be listed:
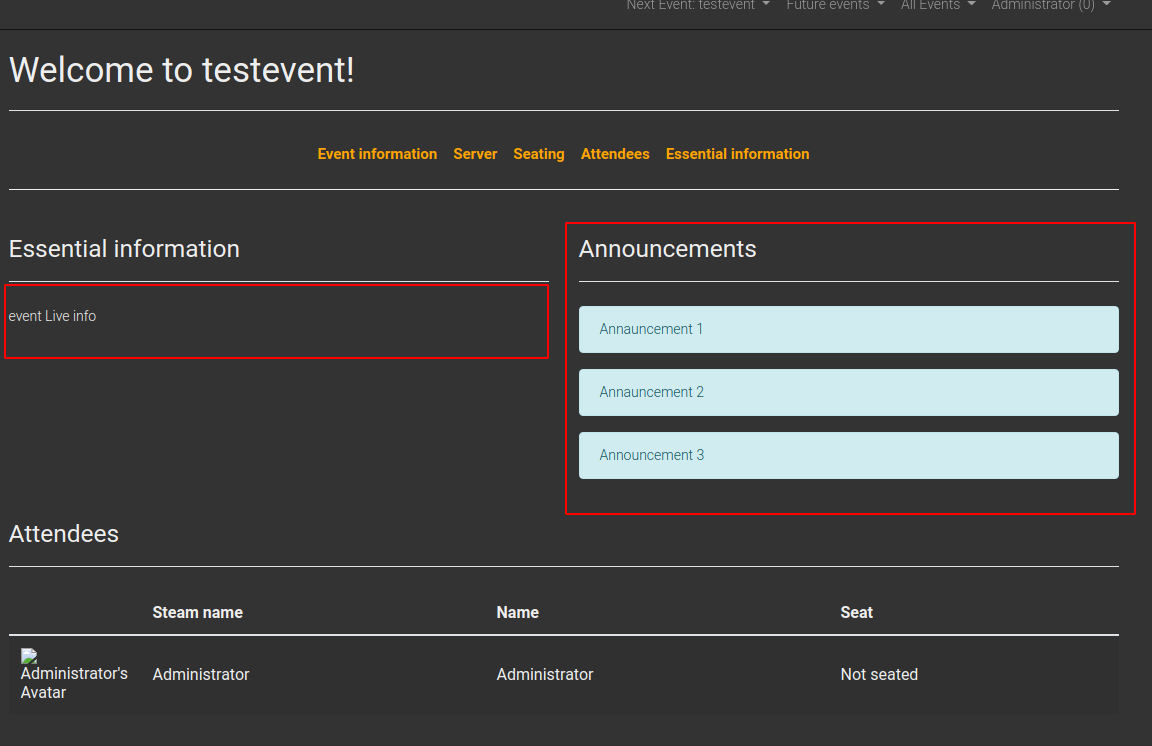
Eventula supports a different home page for paritipants of onging events, which is displayed either after they have been checked in (see Attandees Documentation) or if the event is marked as an online event and the start time is reached. It will look something like that:

The Online event setting is to control the sign up policy for the tournaments and the redirection to the events live homepage for attandees once the event is live. If you dont enable online event, you have to check in all attandees before they are redirected to the events live page and before they can register for tournaments. If you enable Online Event the tournament registration can be done immediatly after a Ticket for the event is bought and the redirection to the events live page is only based on the starting time of the event.
Warning
Also you can currently not use gifted tickets in the Online Event and you should limit the Ticket count to 1 in your Tickets for Online events (see Tickets documentation)! Otherwise there will be problems when attandees with multible tickets triyng to join a tournament.
The allow Spectators option is only suitable for presence events, it allows you to create seperate spectator tickets that are optionally not seatable (see Tickets documentatin).
The Show Matchmaking feature allows you to show the Matchmaking feature embedded in youre event live page. You can alternatively enable a link in the global Navigation that is usable for all registered users, not only Event attendees (See Optional Systems Settings documentation)
If you created the event it will be in the Draft status, so only Administrators can see it. You have to set its status on published once you created all its nessecary content so Users and Guests can see it. This can be done on the Admin overview page of the event.
Editing an Event
You can edit all your Event informations in the detailed event view when you click on it in the admin menu, all the following features can be reached here as well:

Warning
If you edit the start / end time of your event and you have already created timeslots in one of your timetables, you have to check the validity of the entrys!
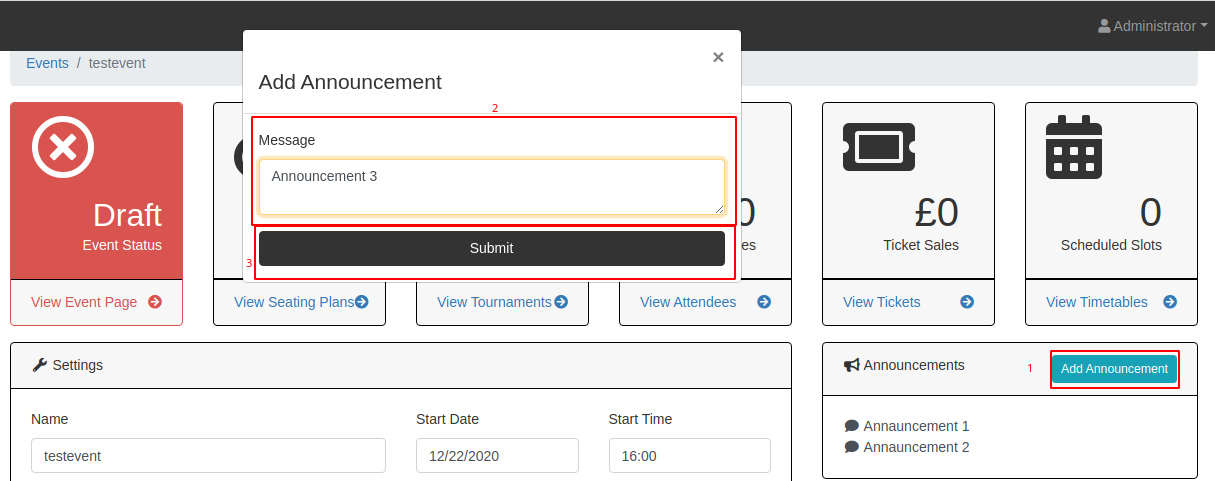
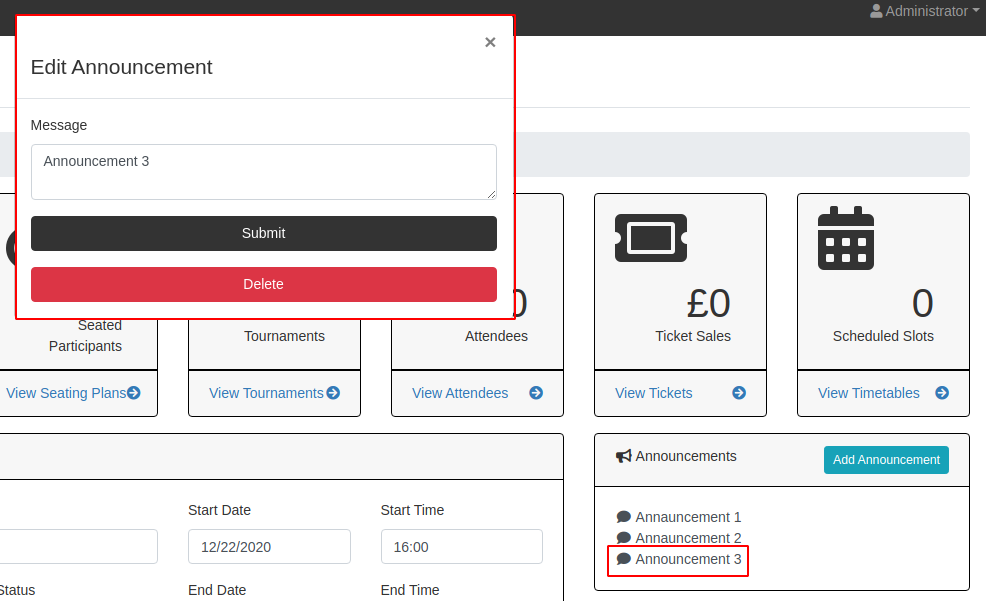
Event Announcements
You can create, edit and delete Announcements on every event, wich will be displayed on the event live page, to get quick messages out to your attandees.
Event information
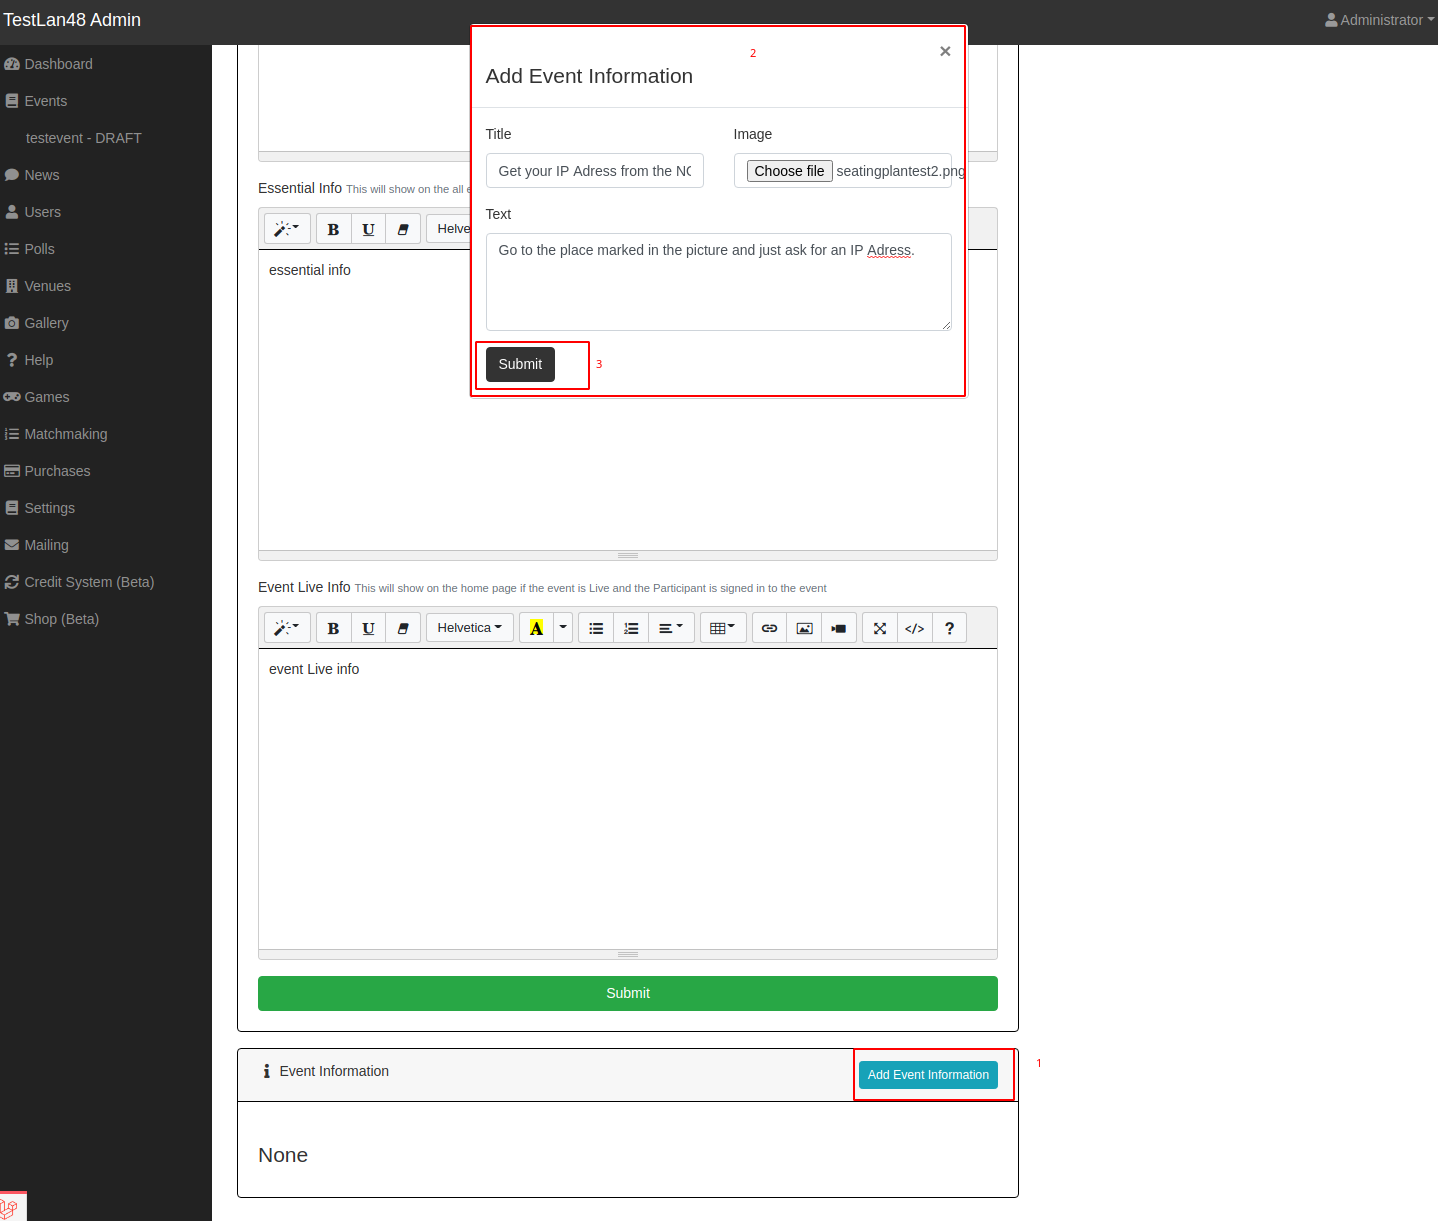
On the buttom of the Event Page you can add / delete / edit Event informations which will be displayed on the Event Information page.
To add an event info entry click Add Event event_event_information_03 and fill out the Title and the Text. You can add an image if you want to.
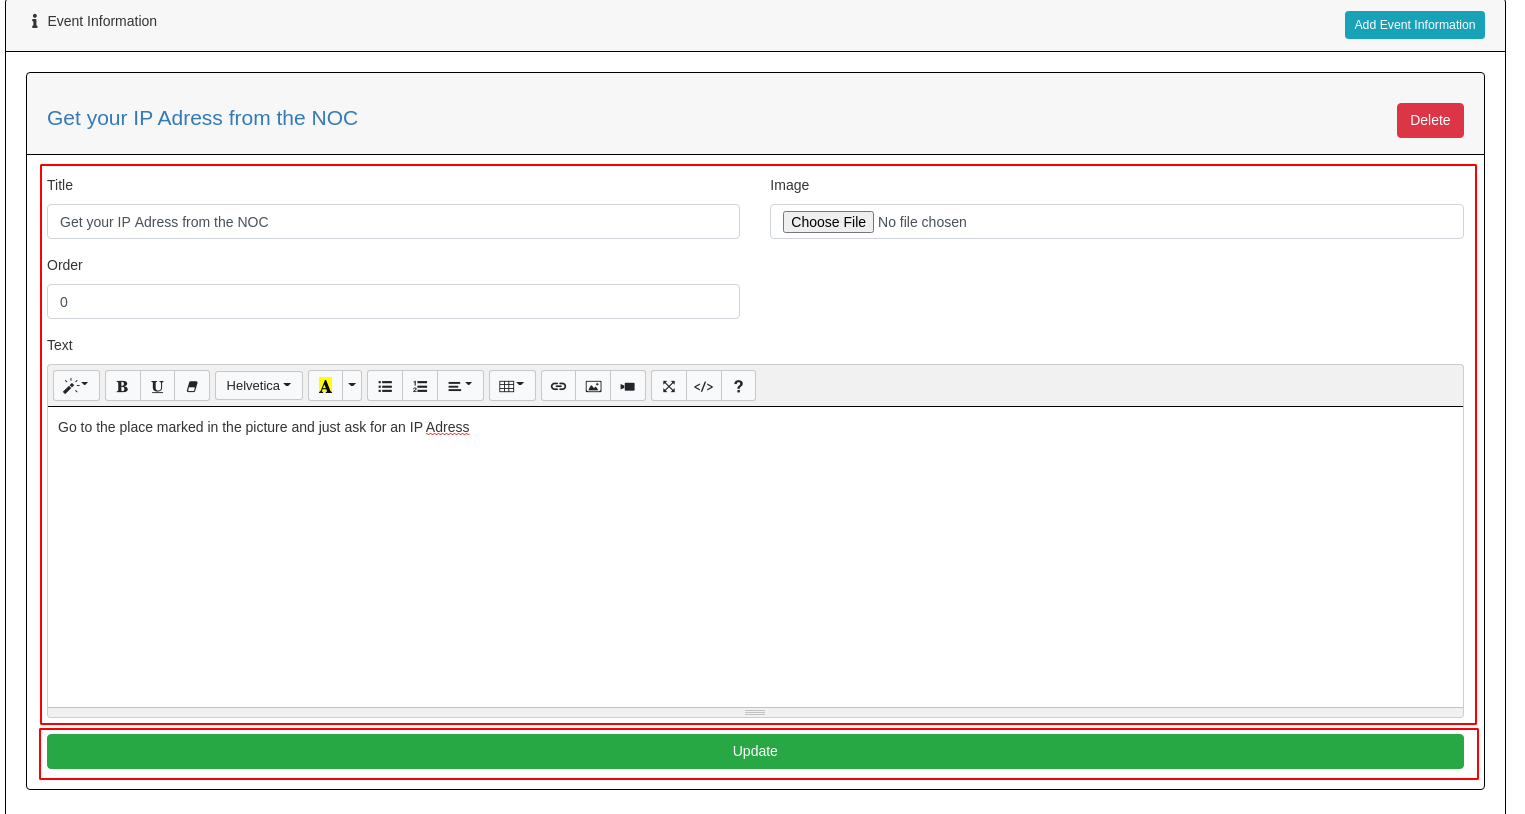
If you want to edit an Entry, you can just click on the Title :

Here you can edit everything that you added in the event information and also set an order for the event informations.
To delete event informations just click Delete on the entry.

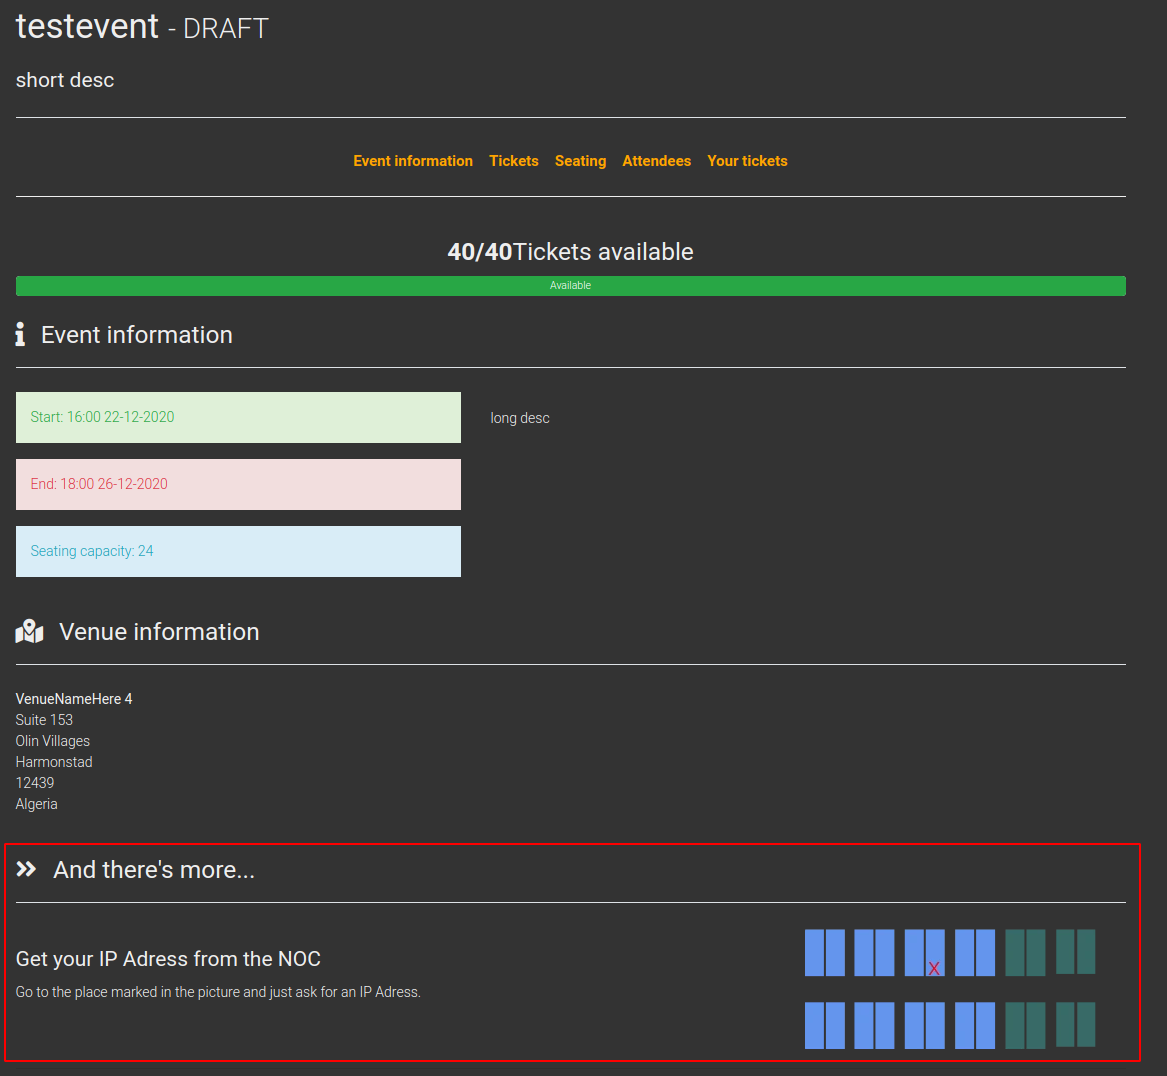
The event information will be shown on the event information page:
Seating
Eventula can manage multiple seatingplans per event, so you can create your different arenas. Obviously the only make sense and are active on event which are not configured as online events (see Event creation)
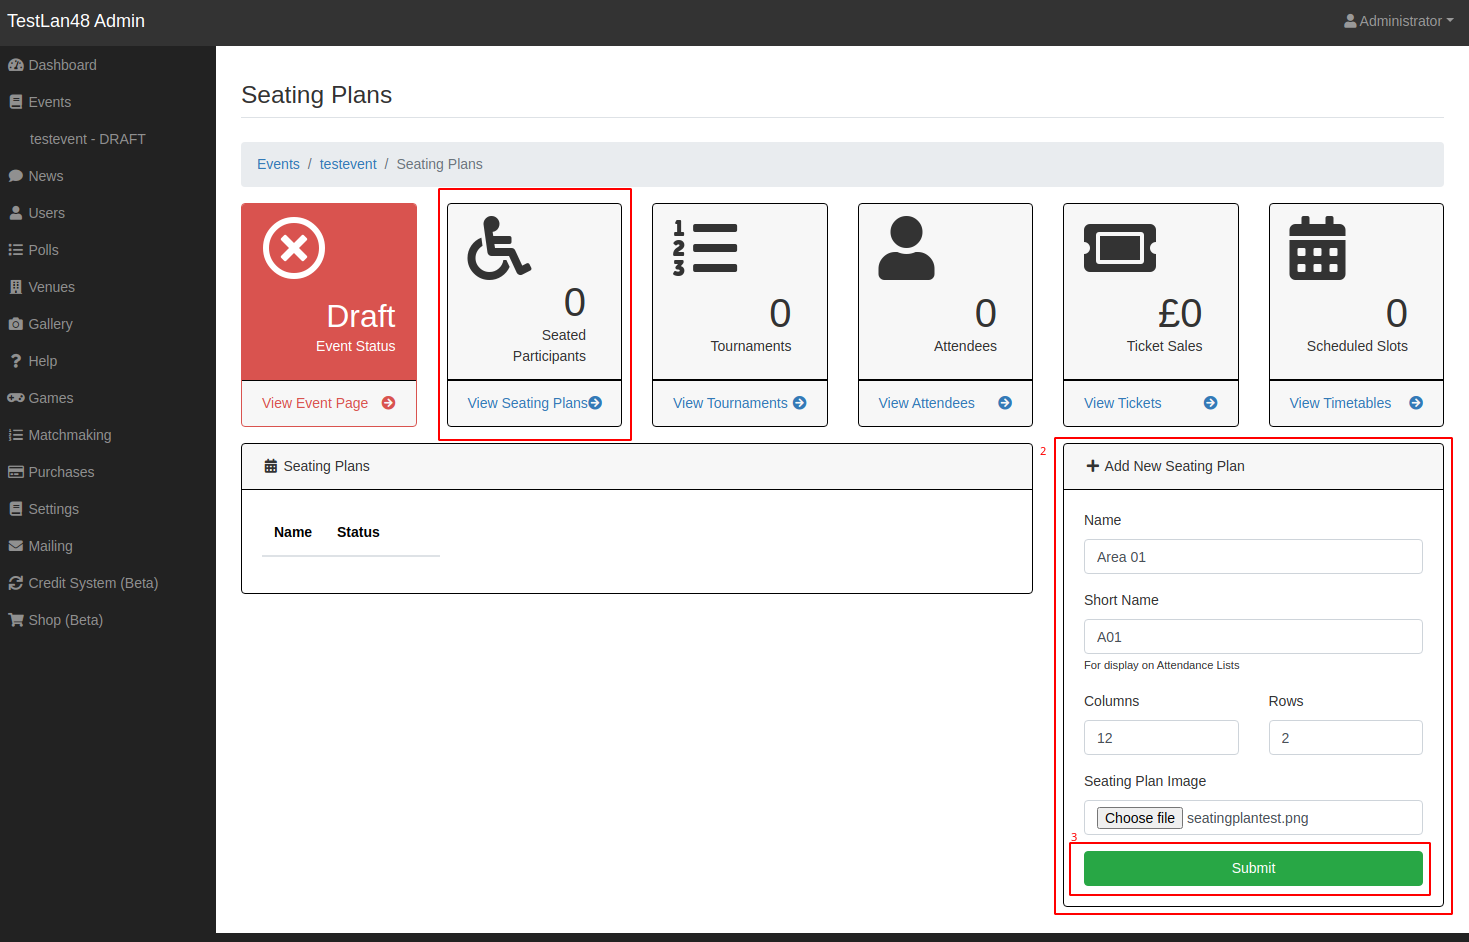
you can create, edit and delete them in the Admin Panel in your Event if you click on View Seating Plans on the top.
after the creation you will see the drafted seatingplan and you could seat event attandees manually before the publication, but you have to set the status to published to ensure the attandees will be able to seat themselfes after buying a Ticket.
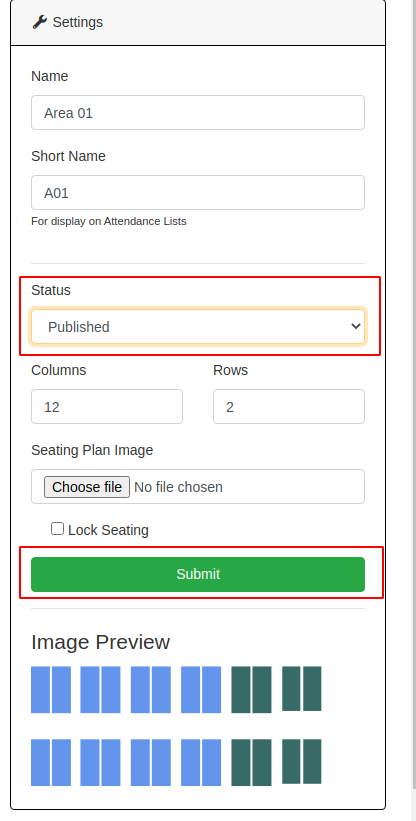
If you activate Lock Seating no more changes can be made by the users, even if the seatingplan is published.
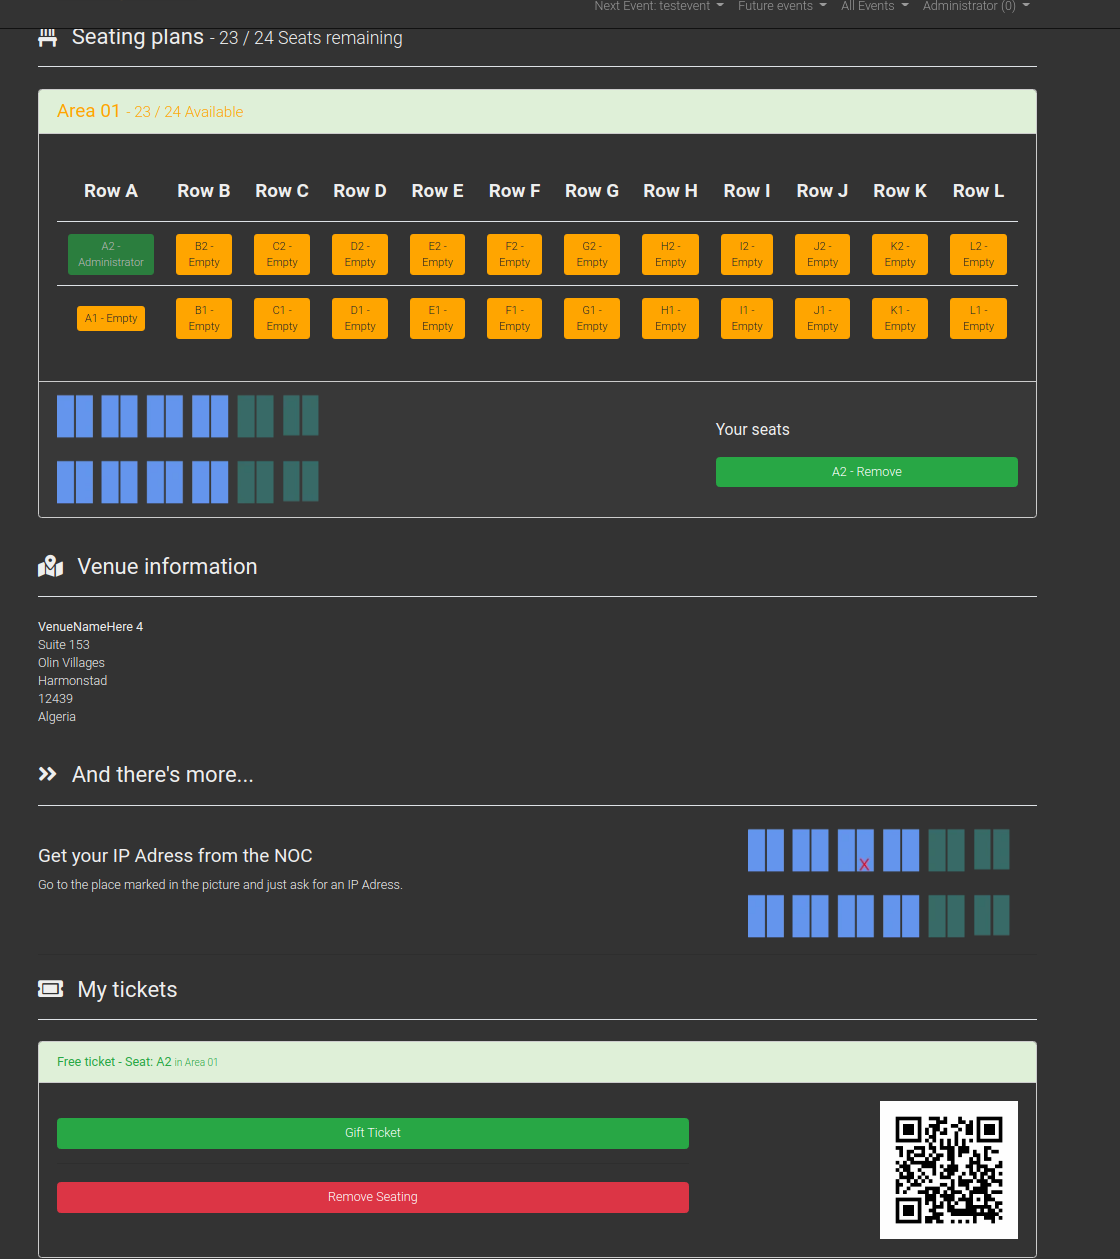
The seatingplan will look something like this on the event Information page:
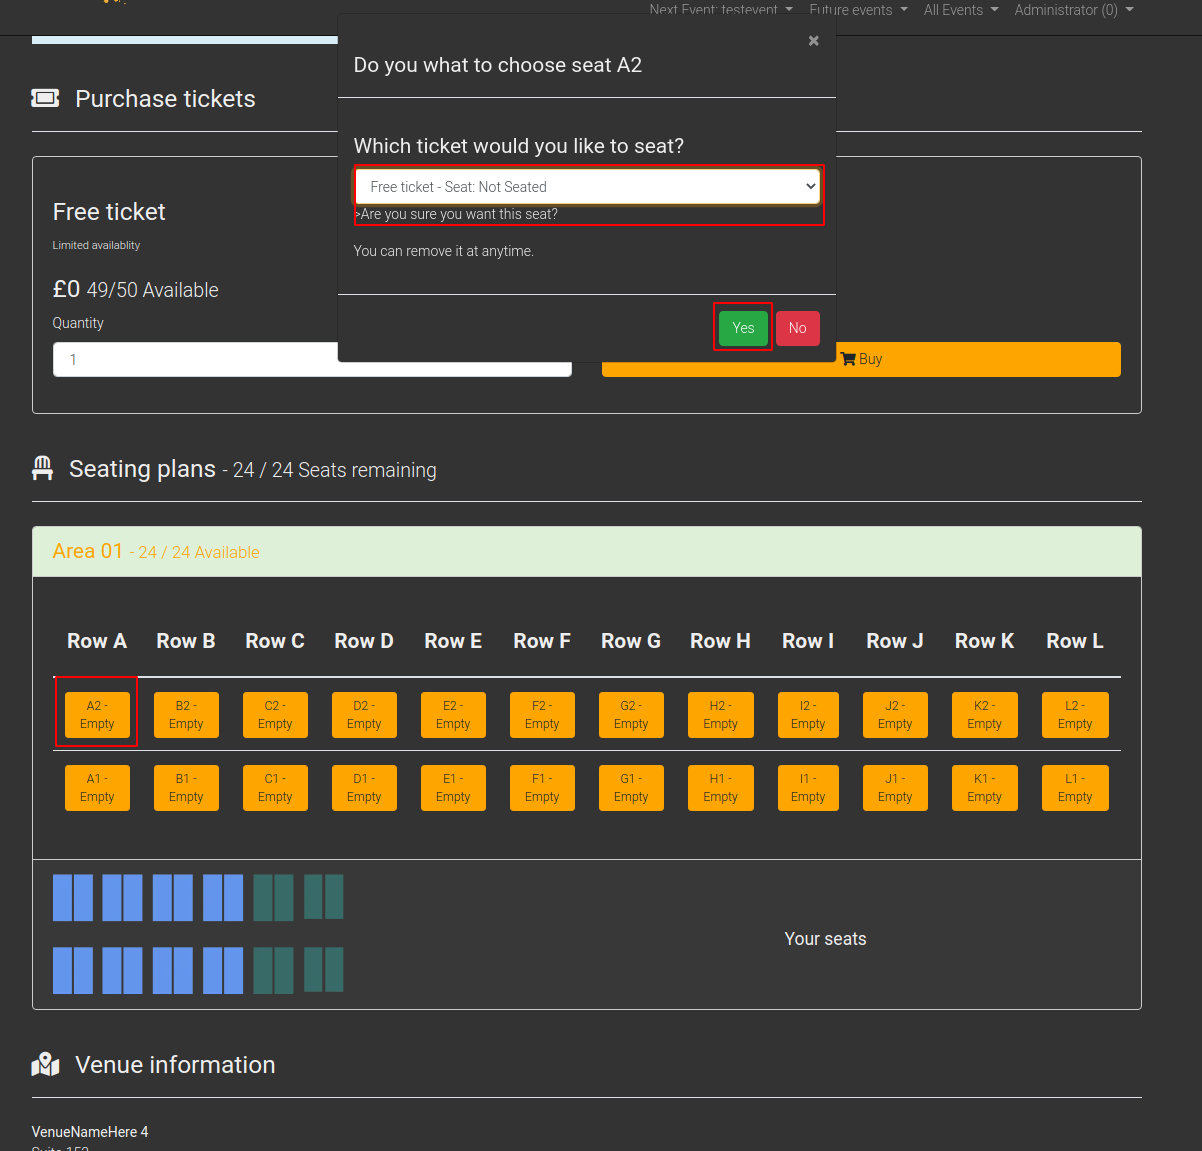
And something like this if you seated yourself:
Tournaments
Todo
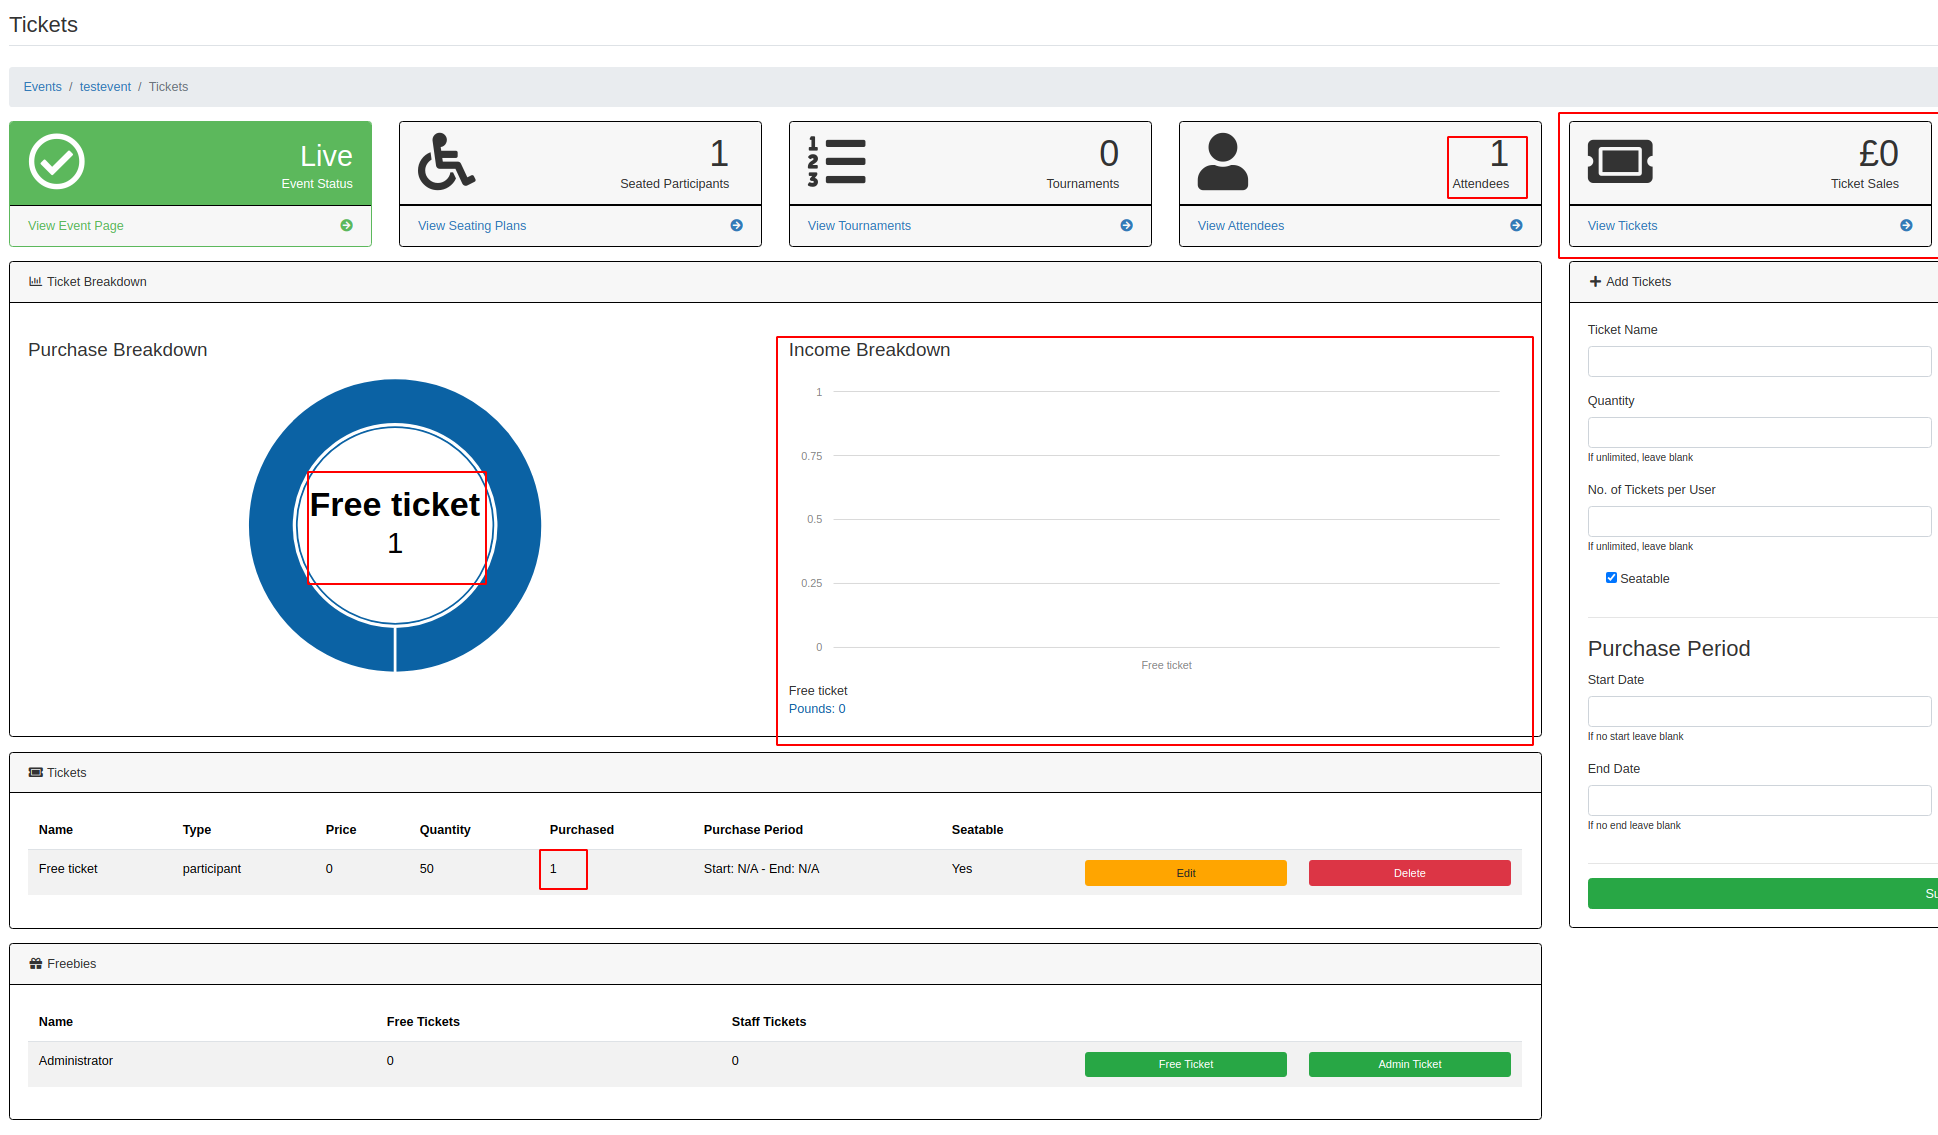
Tickets
If you change to the Tickets view, you can create different types of tickets (even free ones in combination with the free payment provider(see Payment Settings documentation)) and you can assign different users some free tickets or Admin tickets. You can see the assignment signed blue in the picture.
Note that Admin tickets cannot participate in tournaments!
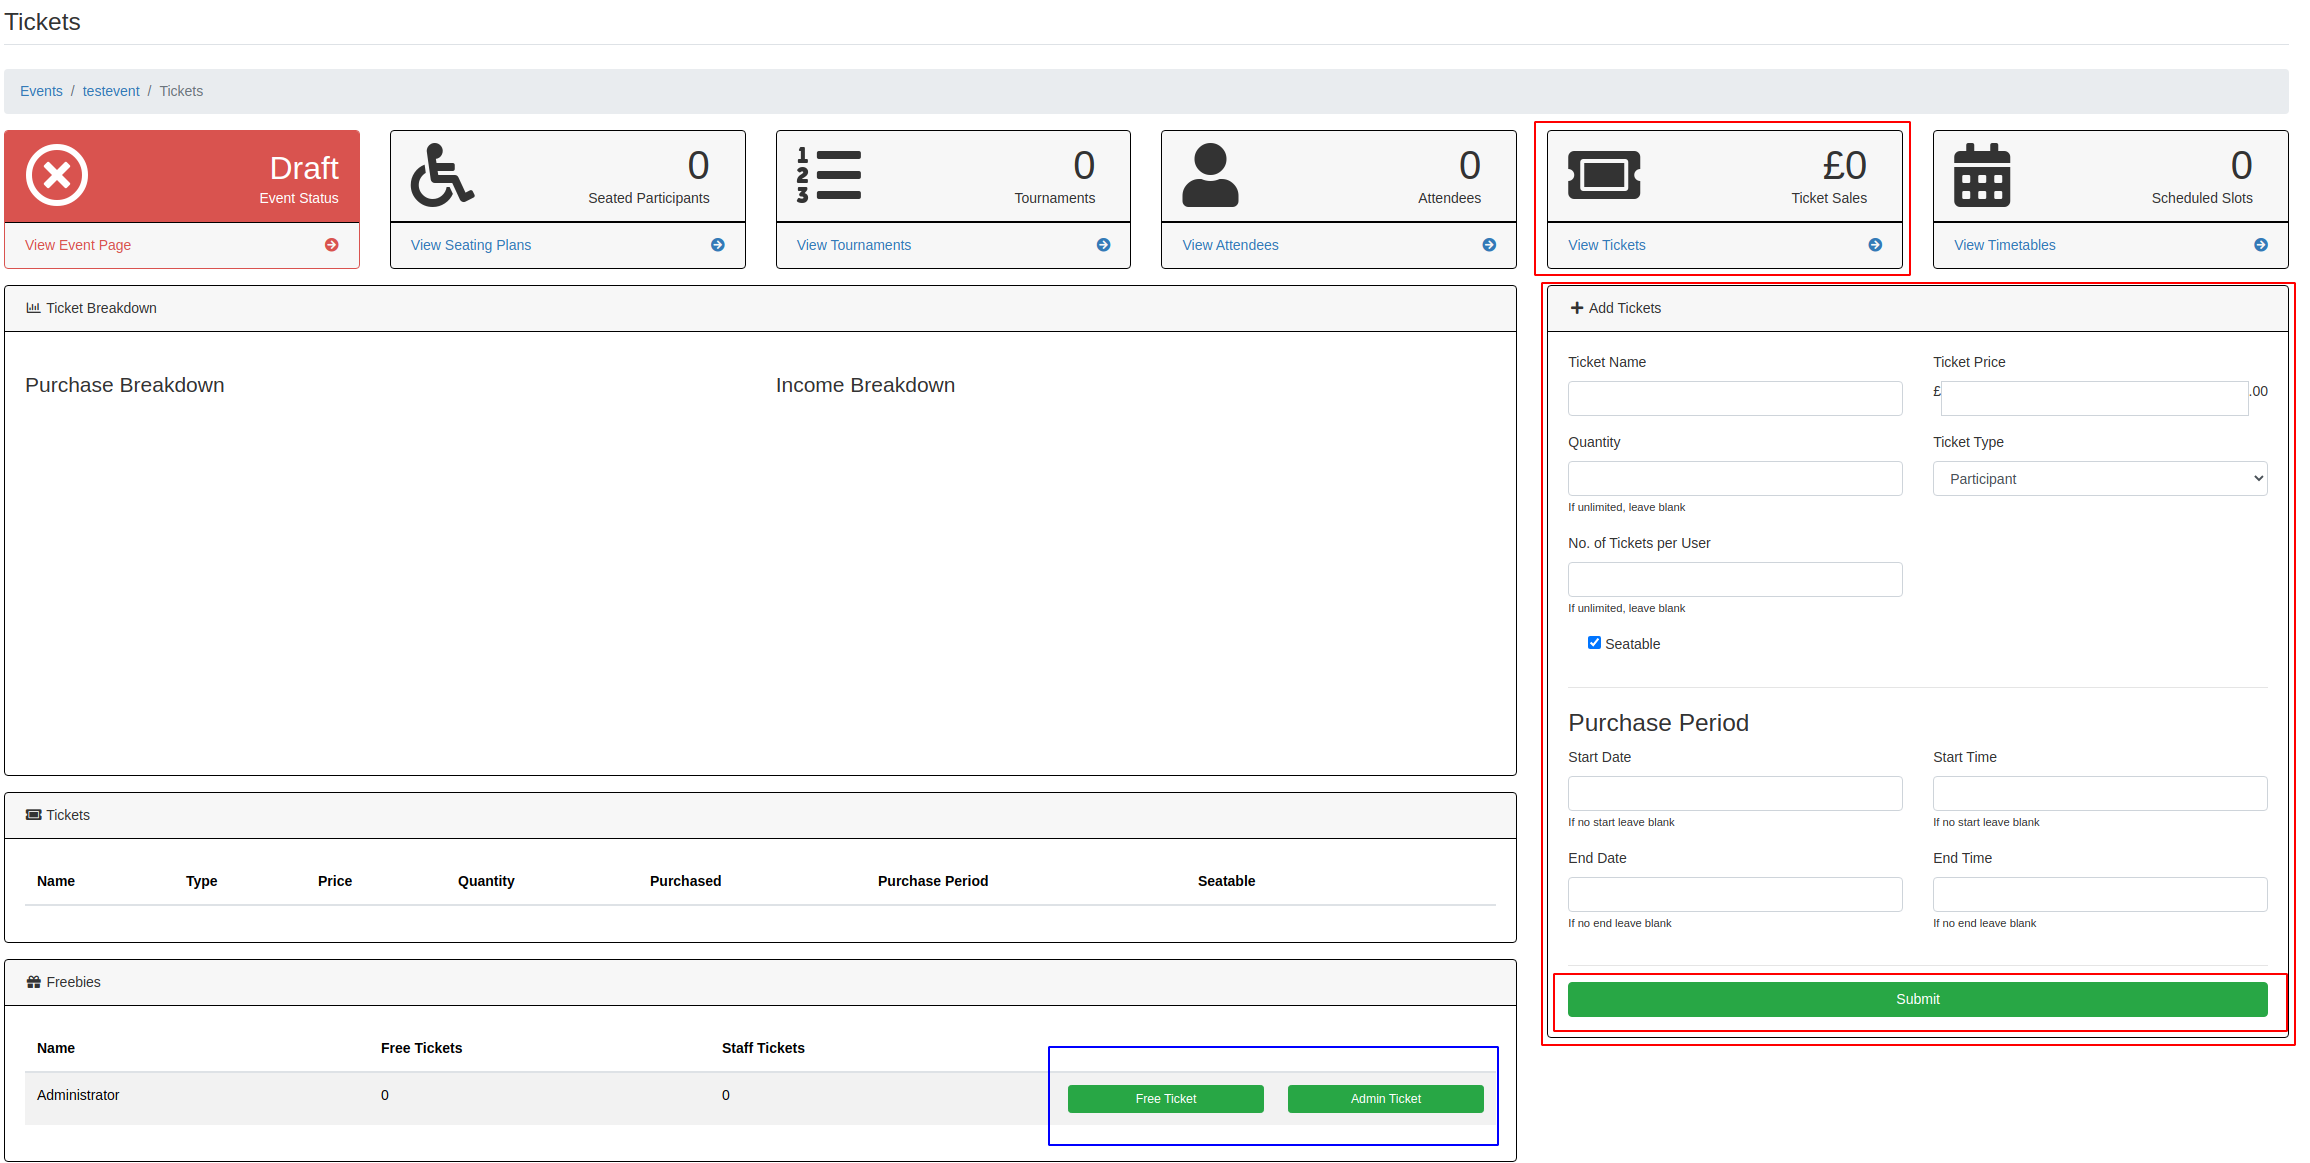
To add a Ticket type, fill at least the Ticket Name, Ticket Price (which as said can be 0), the Ticket Type (Participant or Spectator) and if the Ticket is seatable.
Warning
If you are doing Online events dont use seatable Tickets and dont use Spectator tickets. Also Limit the No of Tickets per user to 1!
You can edit all these settings only until the first kind of the Ticket is sold!
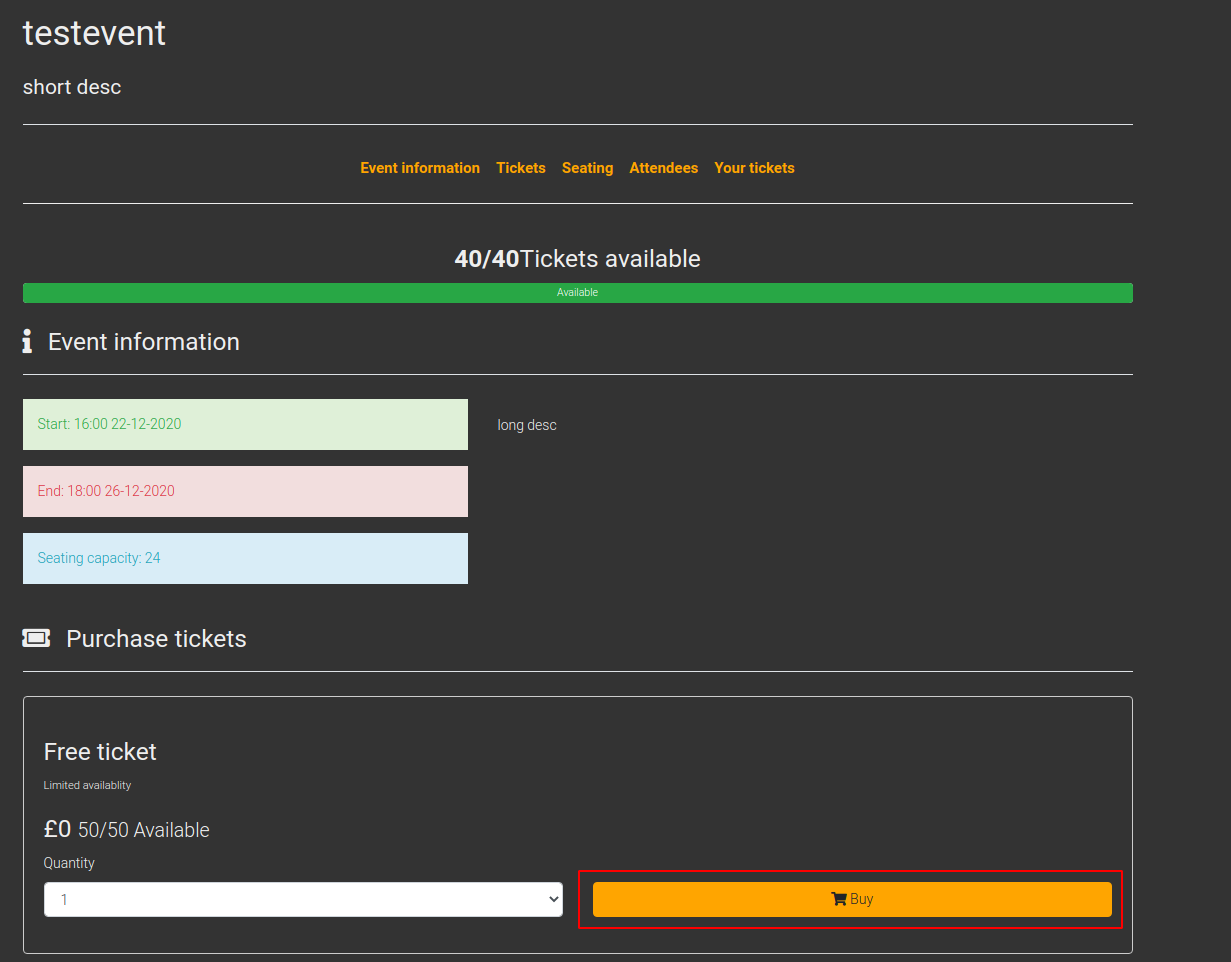
For showing how the purchasing process looks, i have created a Free Ticket with the Name Free ticket:
different payment providers (check Payment Settings documentation for more Info!)
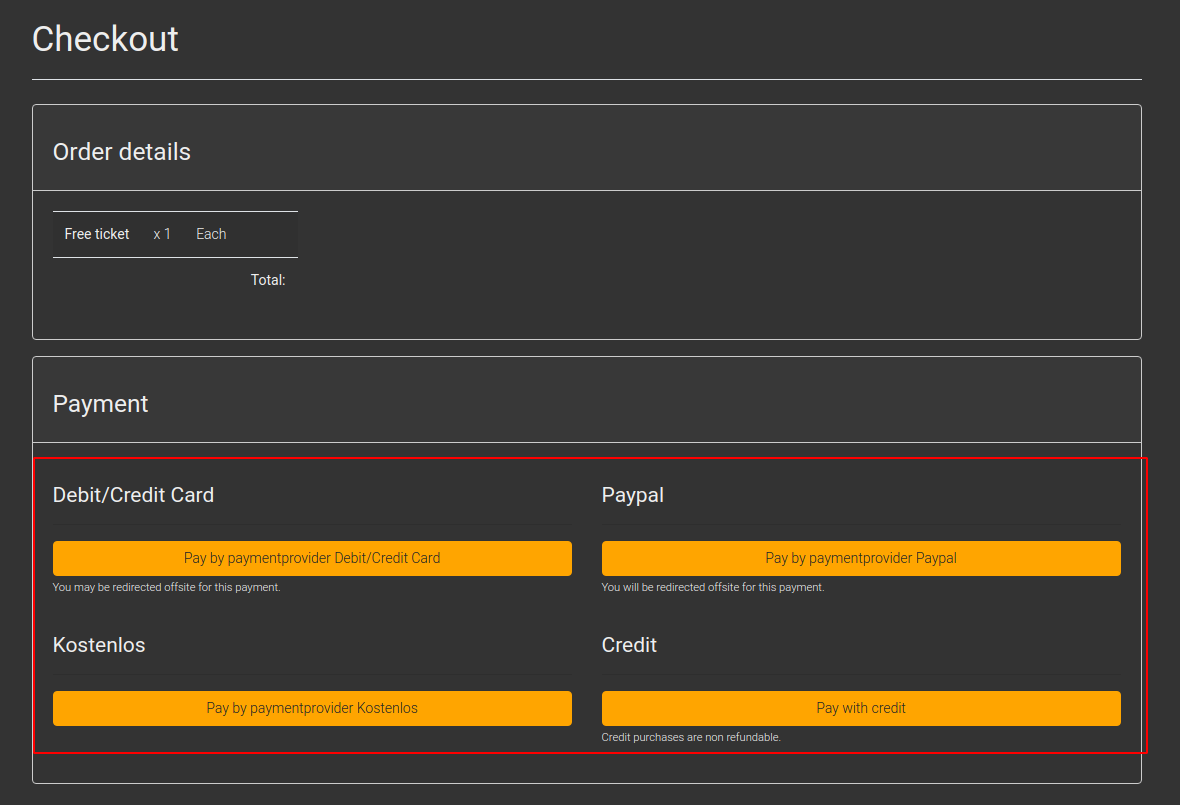
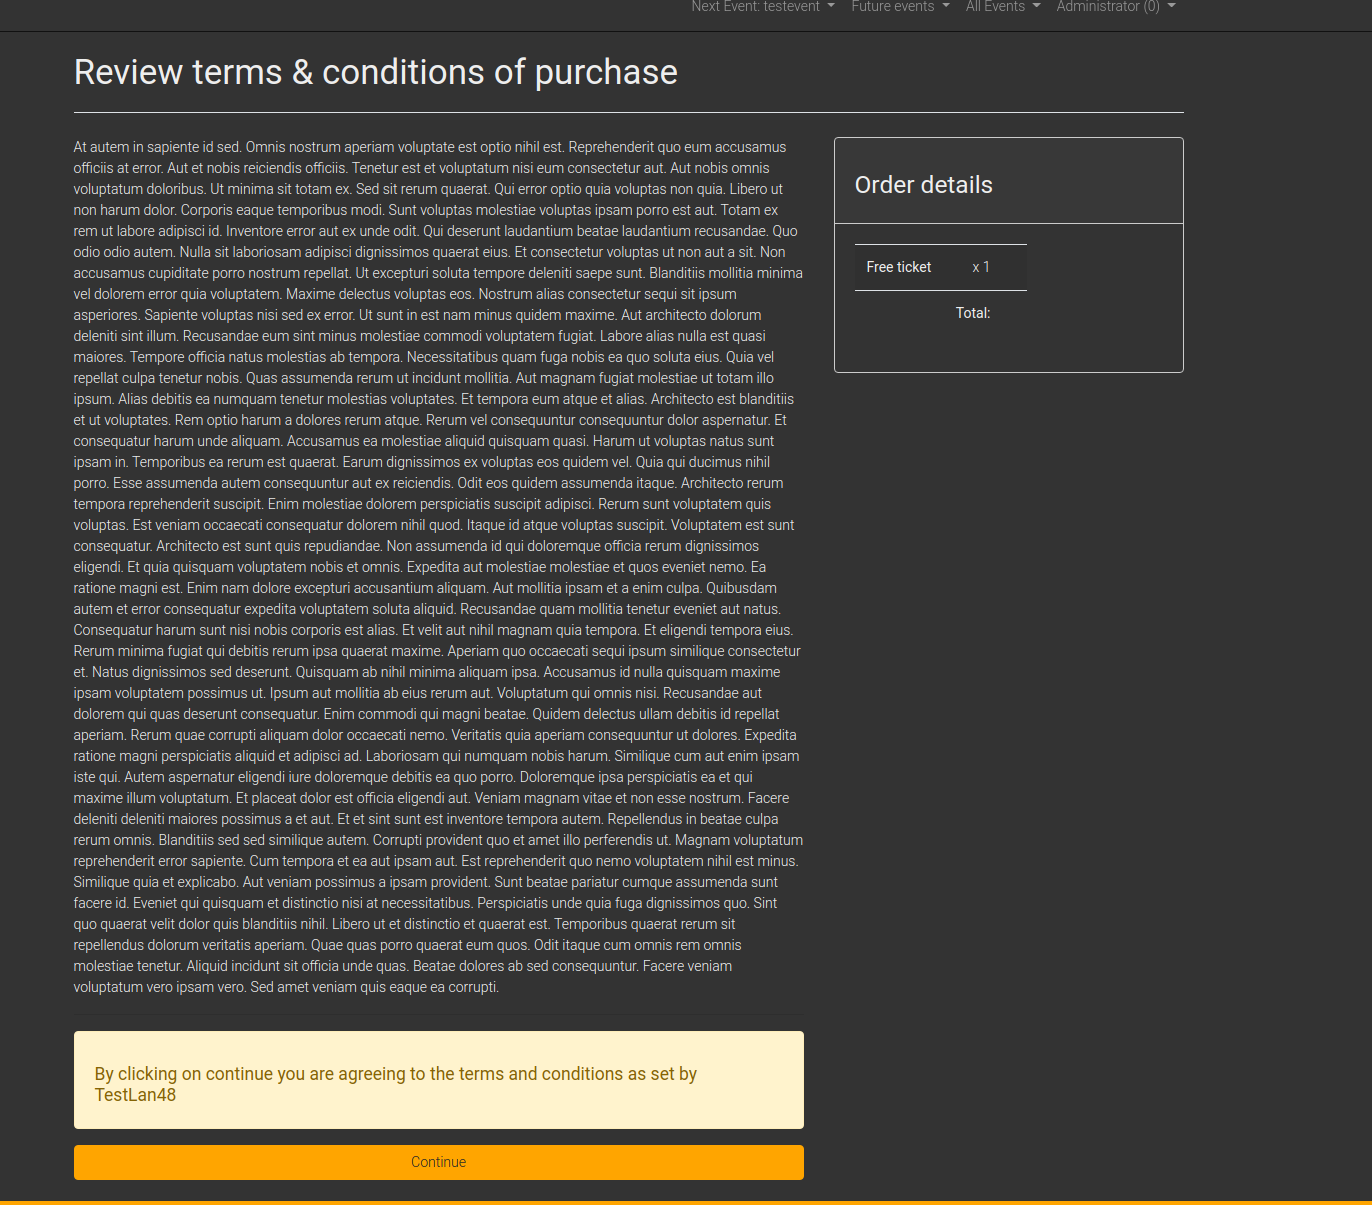
The user has to accept the terms and conditions (check Payment Settings documentation for more Info!)
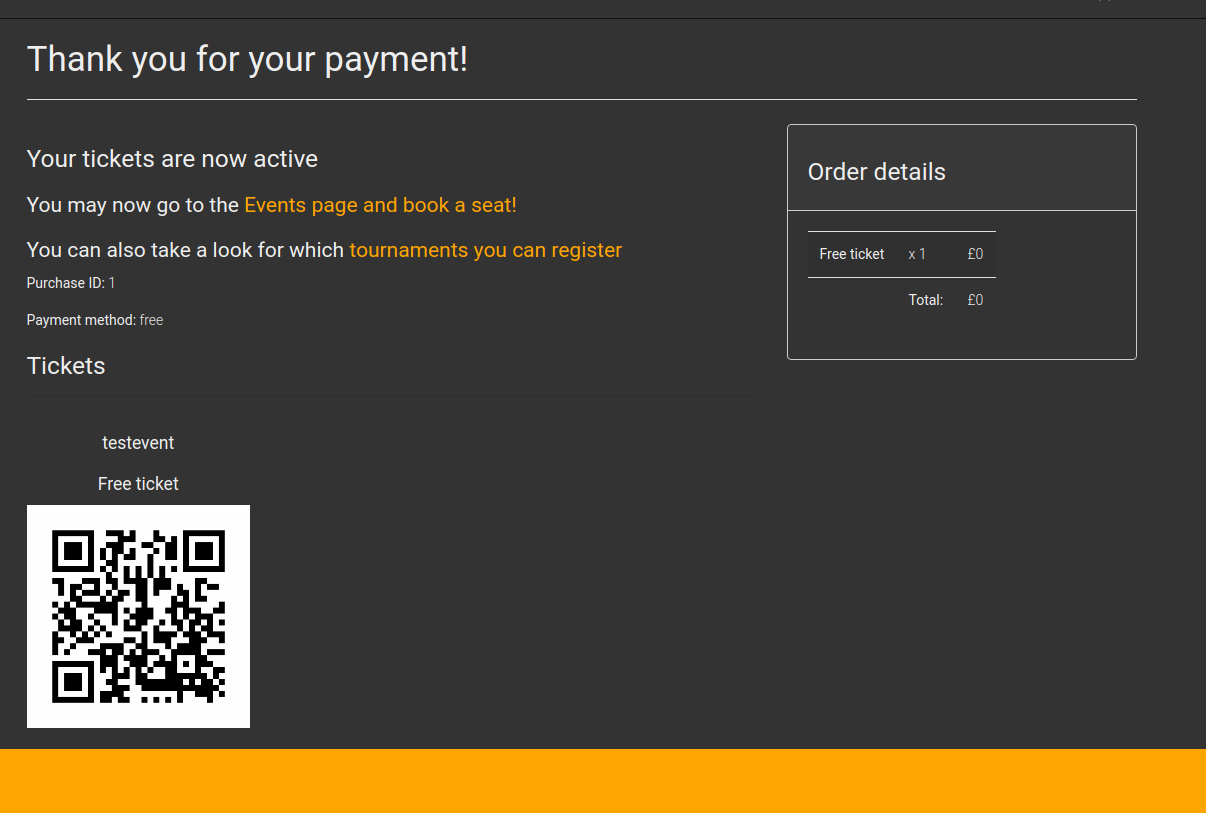
And can finnaly jump to the events page via this message:
And you can see how many Tickets you sold of which kind in the admin Menu:
Attendees
In the attendees view you can see all Attendees of your event listed, you can transfer them to a diffet event or sign them in at a presence event:
Cou can either go to Freebies to show only all attendees you gave a Free Ticket via the tickets view (not including attendees which “bought” a Free Ticket you added as a Ticket)

or pick one in the List direcctly:

and click on signed in to sign the atendee in:
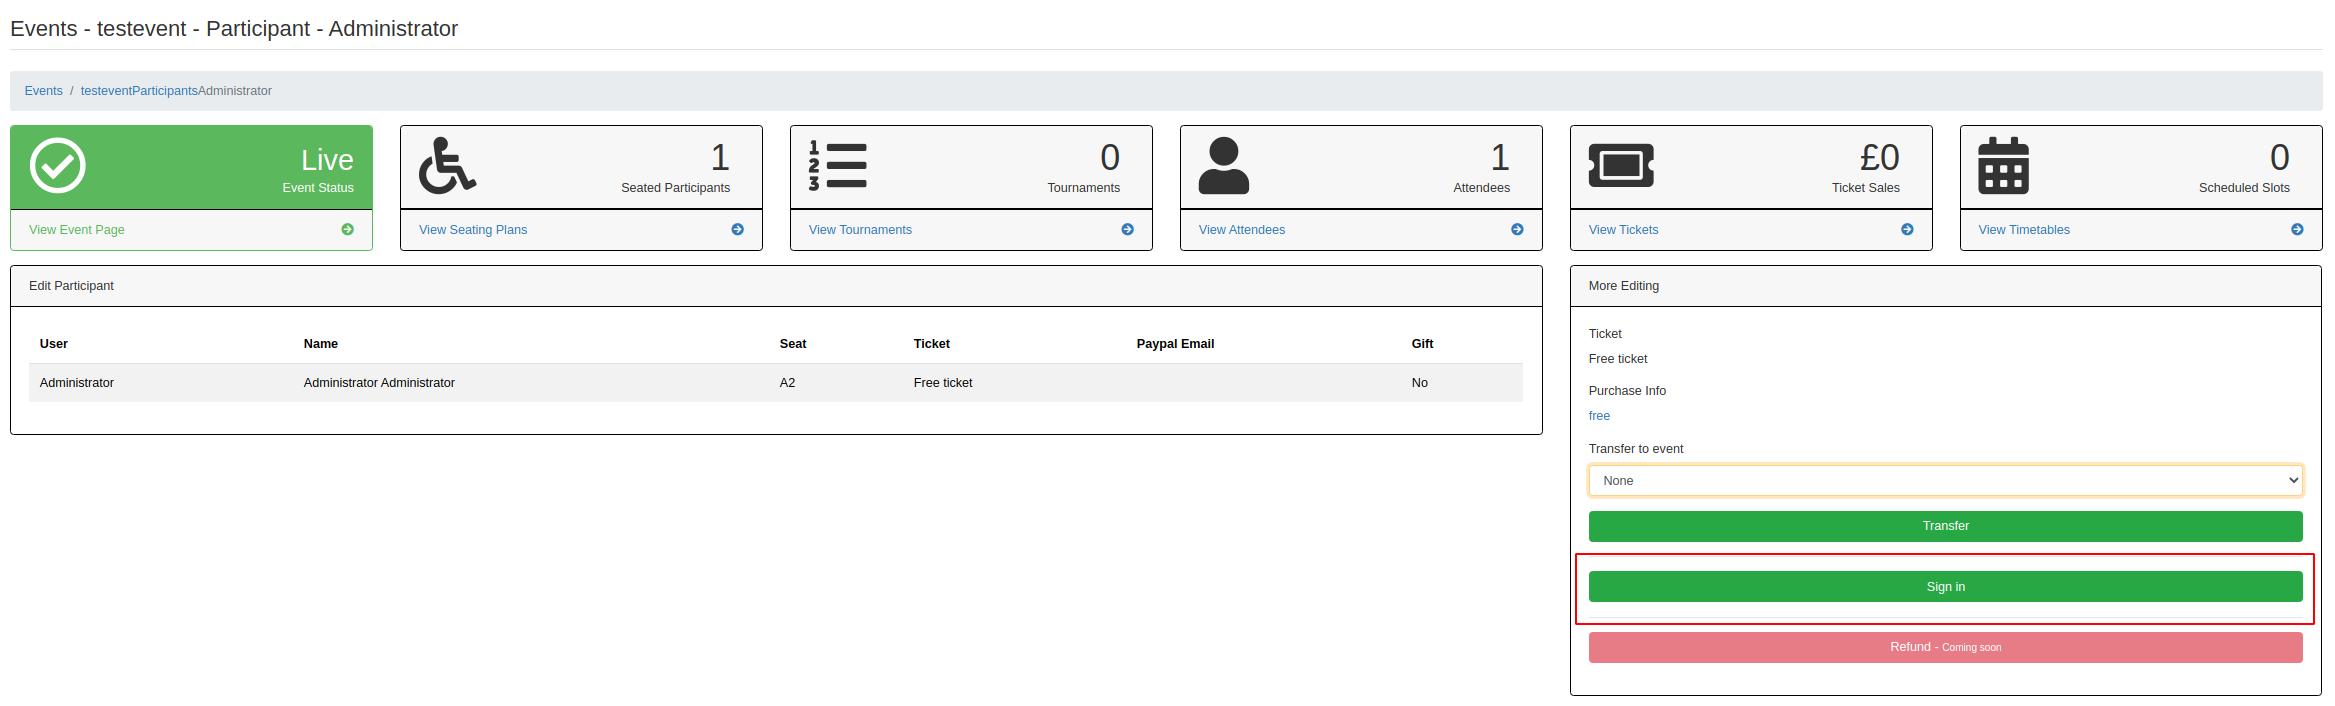
This can be done as well by scanning the QR code which the user gets in his ticket.
Warning
The QR Code feature is currently untested!
Timetables
In the timetables view you can add different Timetables to organize the schedule of your event.
You can see all your Timetables listed here, press Edit to get into the detailed view:
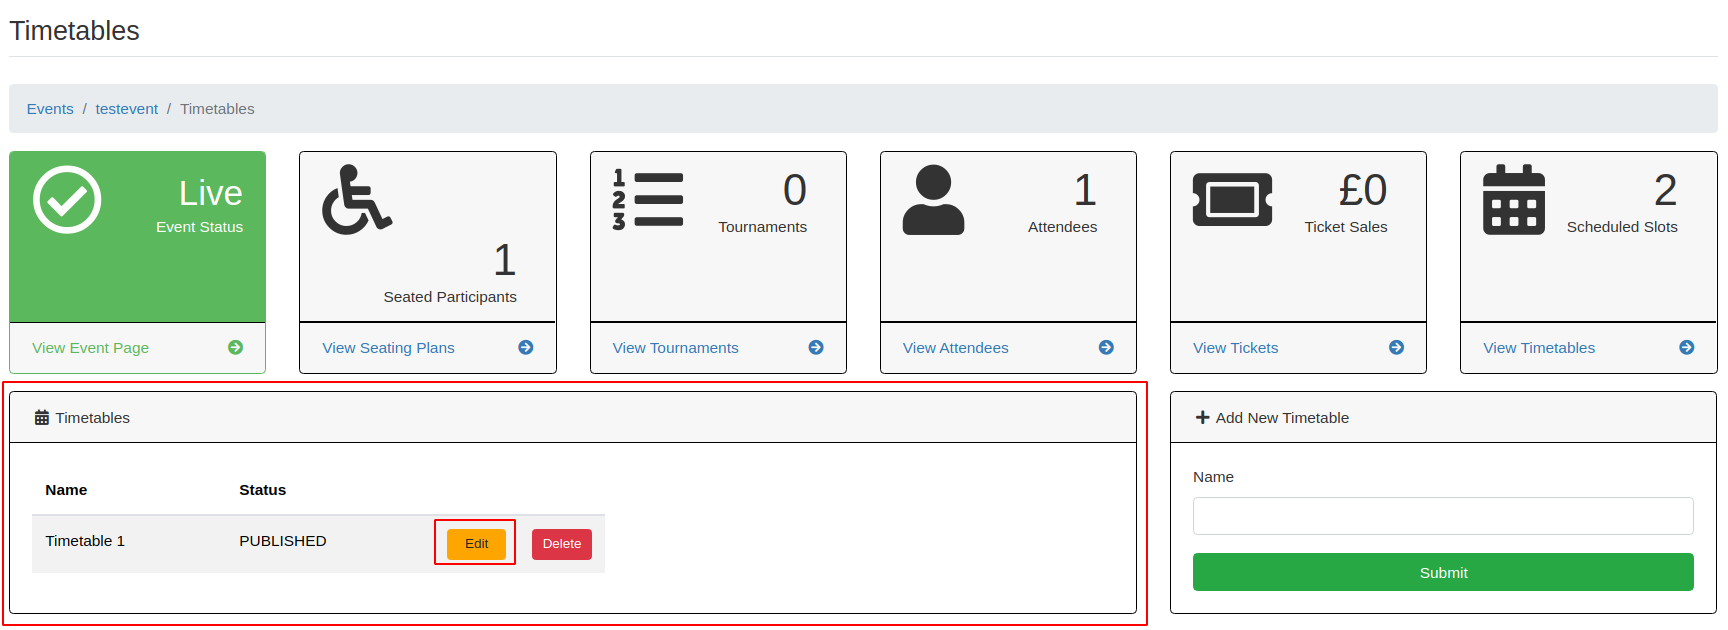
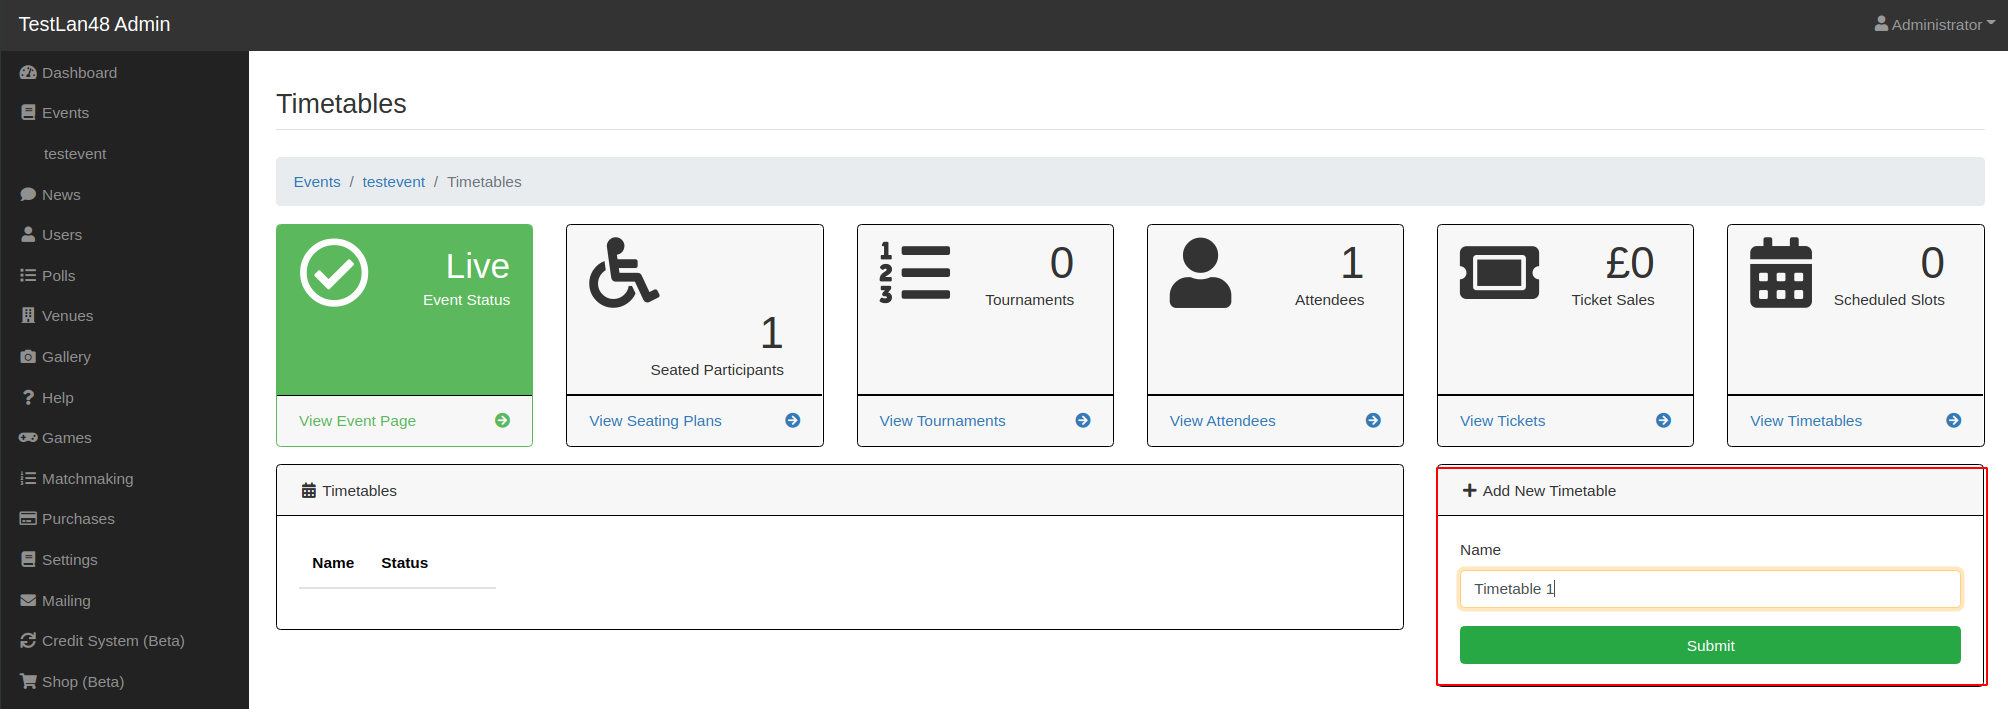
To add a Timetable, enter a Name for it in the Add New Timetable area over the right and klick submit:
you can now see the detailed view of your timetable and you can add Timeslots over the right:
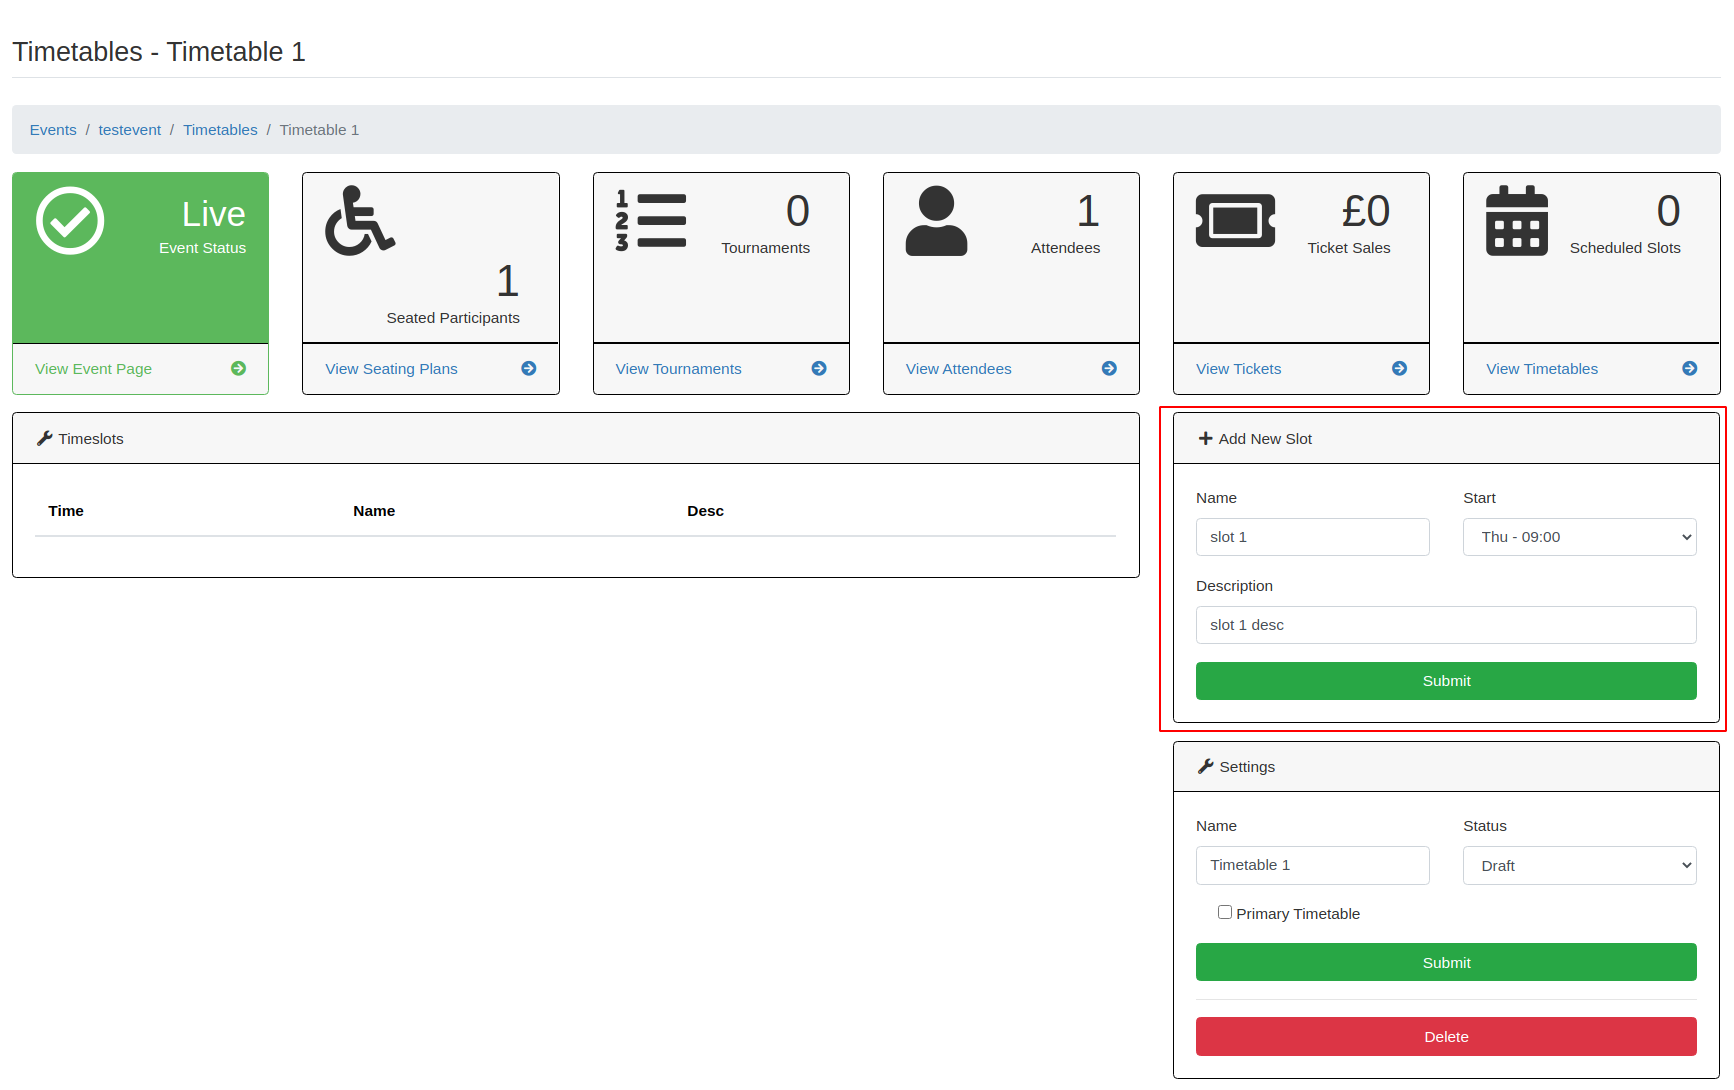
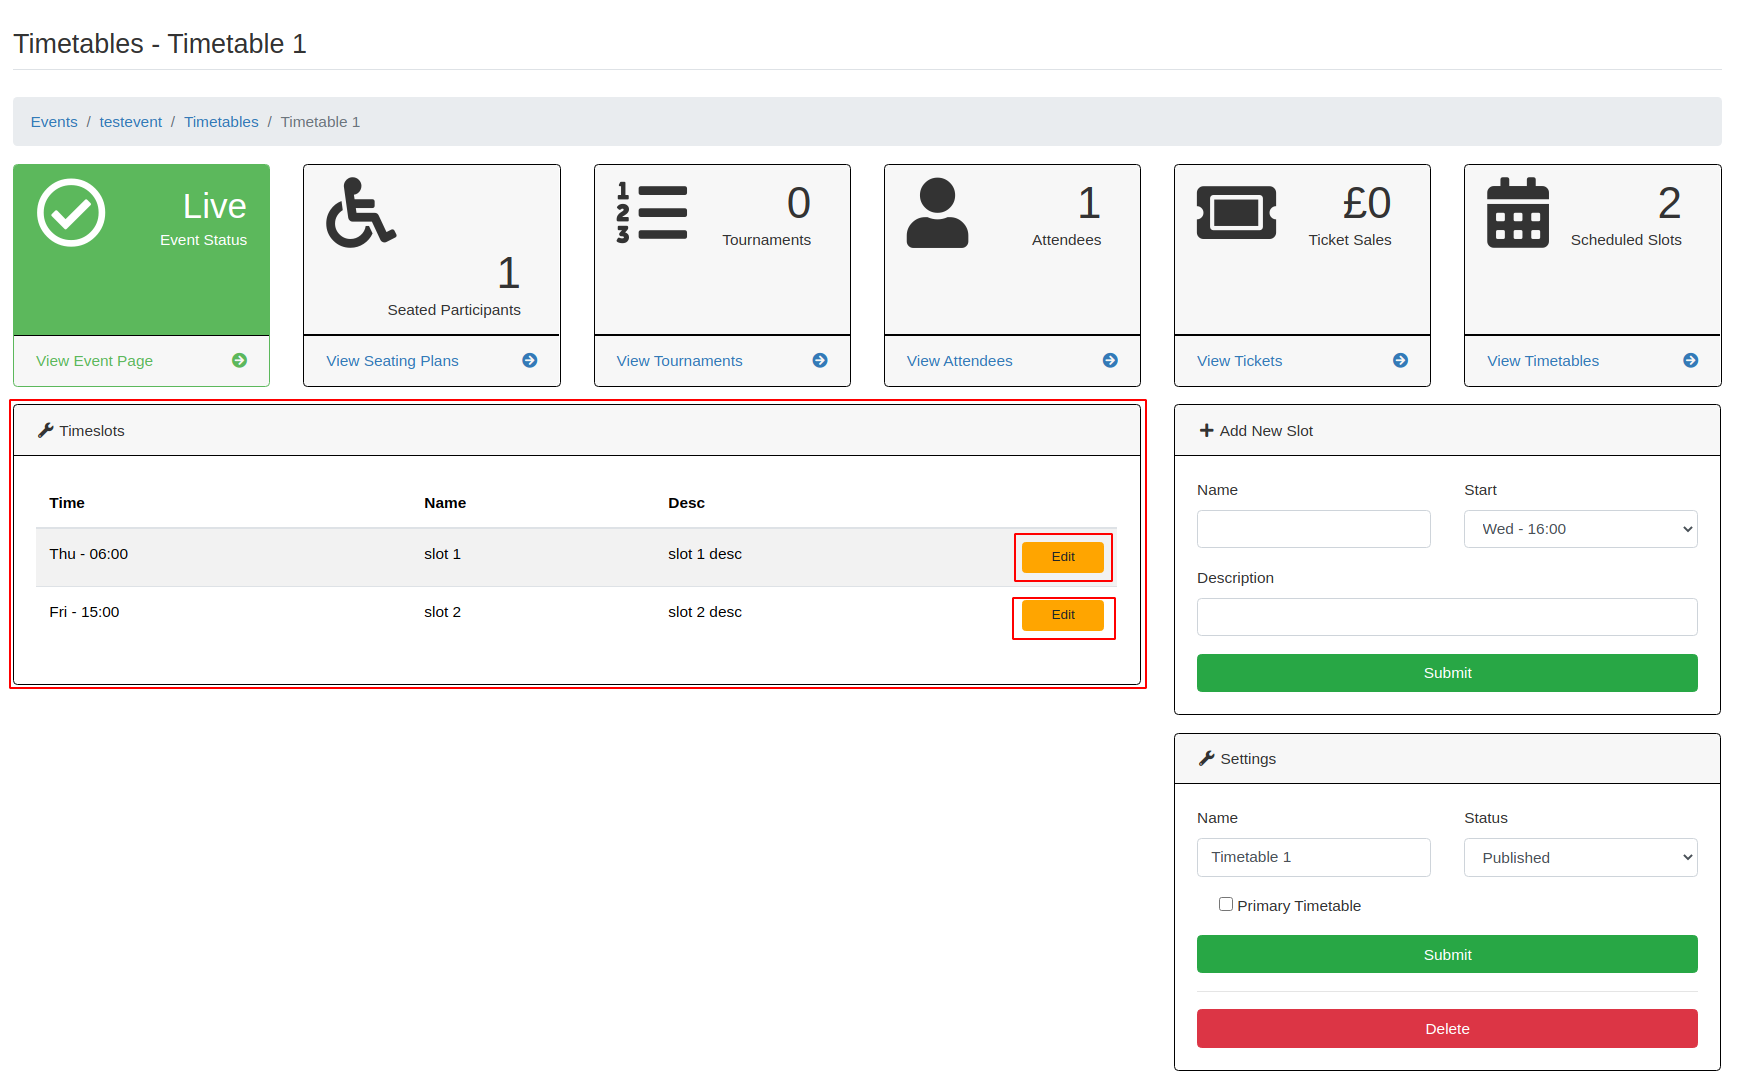
after that you can always use the Edit Button in the List of `` Timeslots `` to edit the slot:
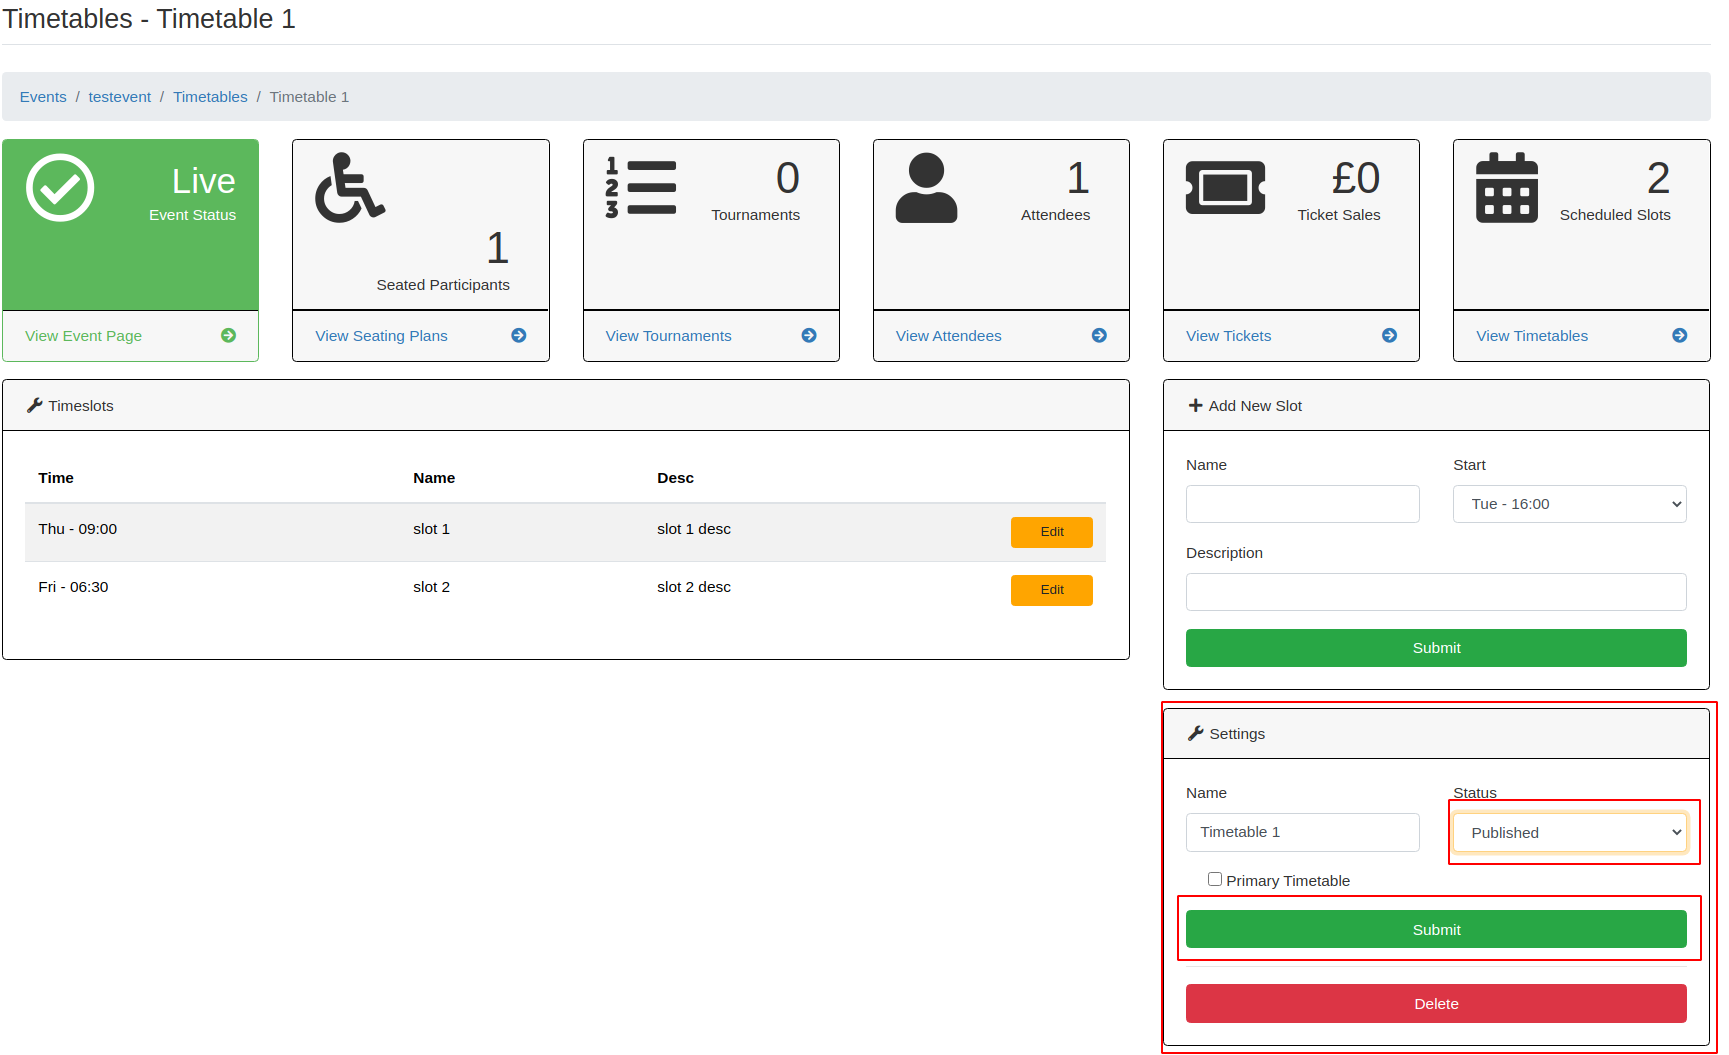
To use the timetable you have to set it to Published in the Settings area:
Warning
The feature Primary Timetable does nothing currently!
Now your Timetable is visible in the events detailed view:
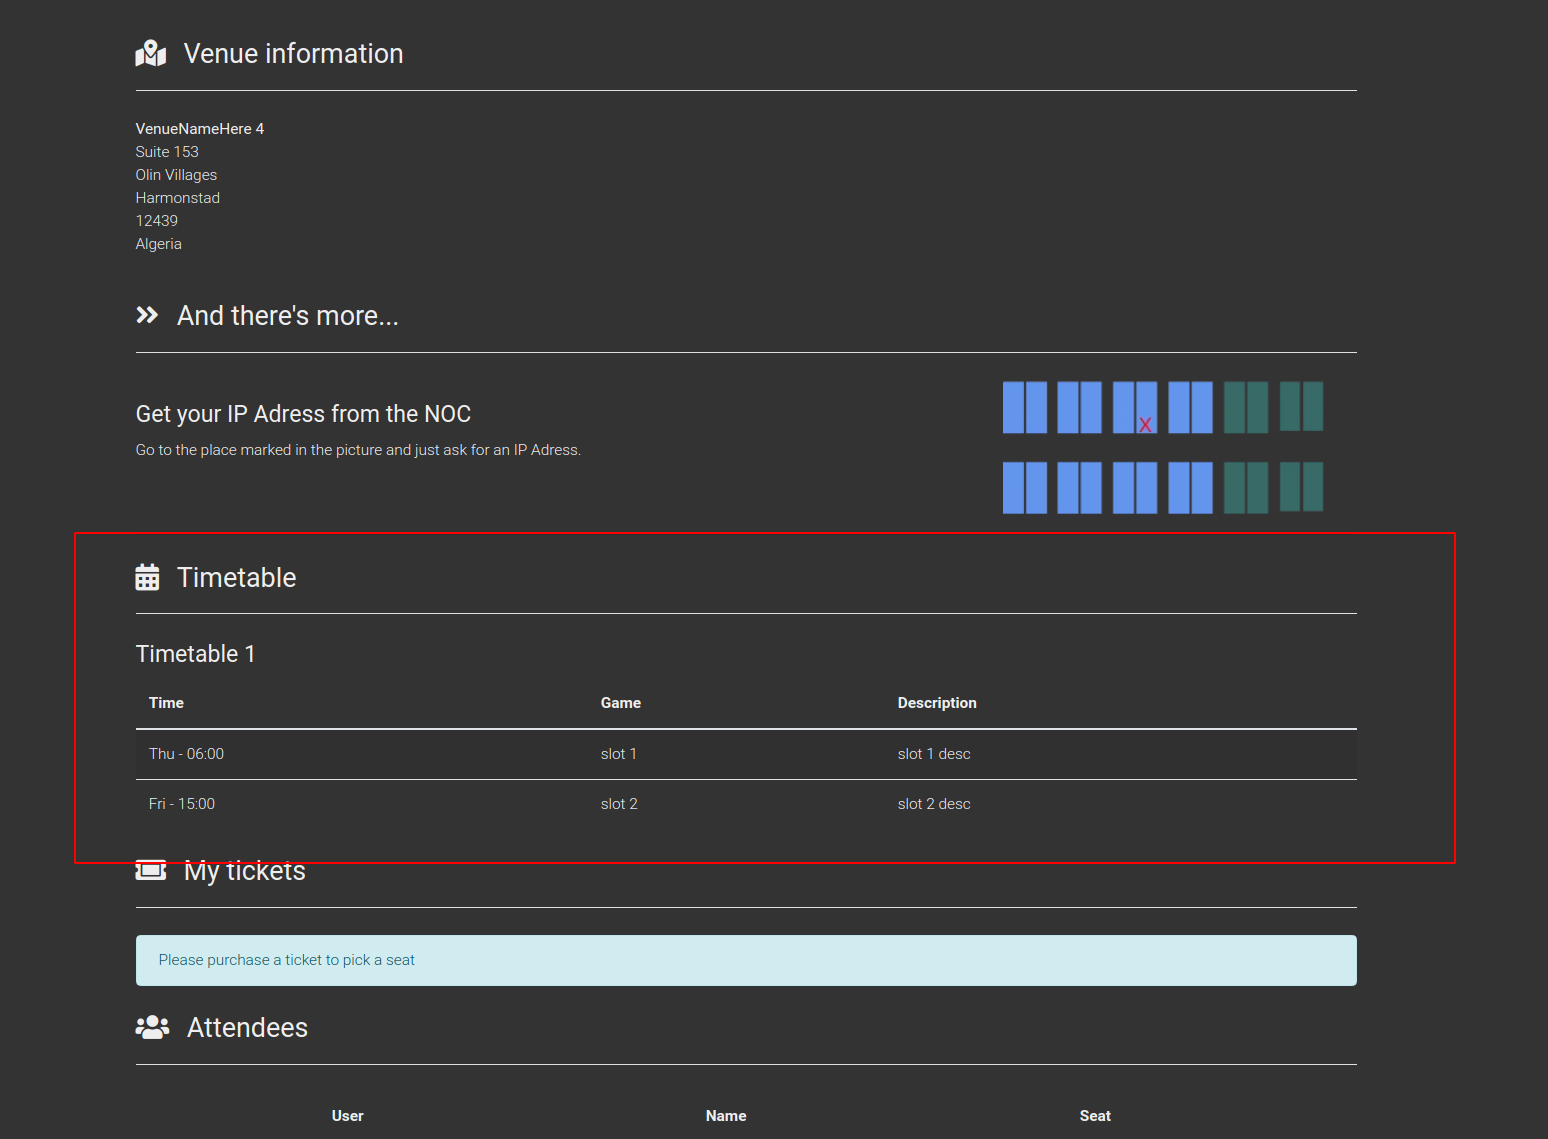
and in the event live page:
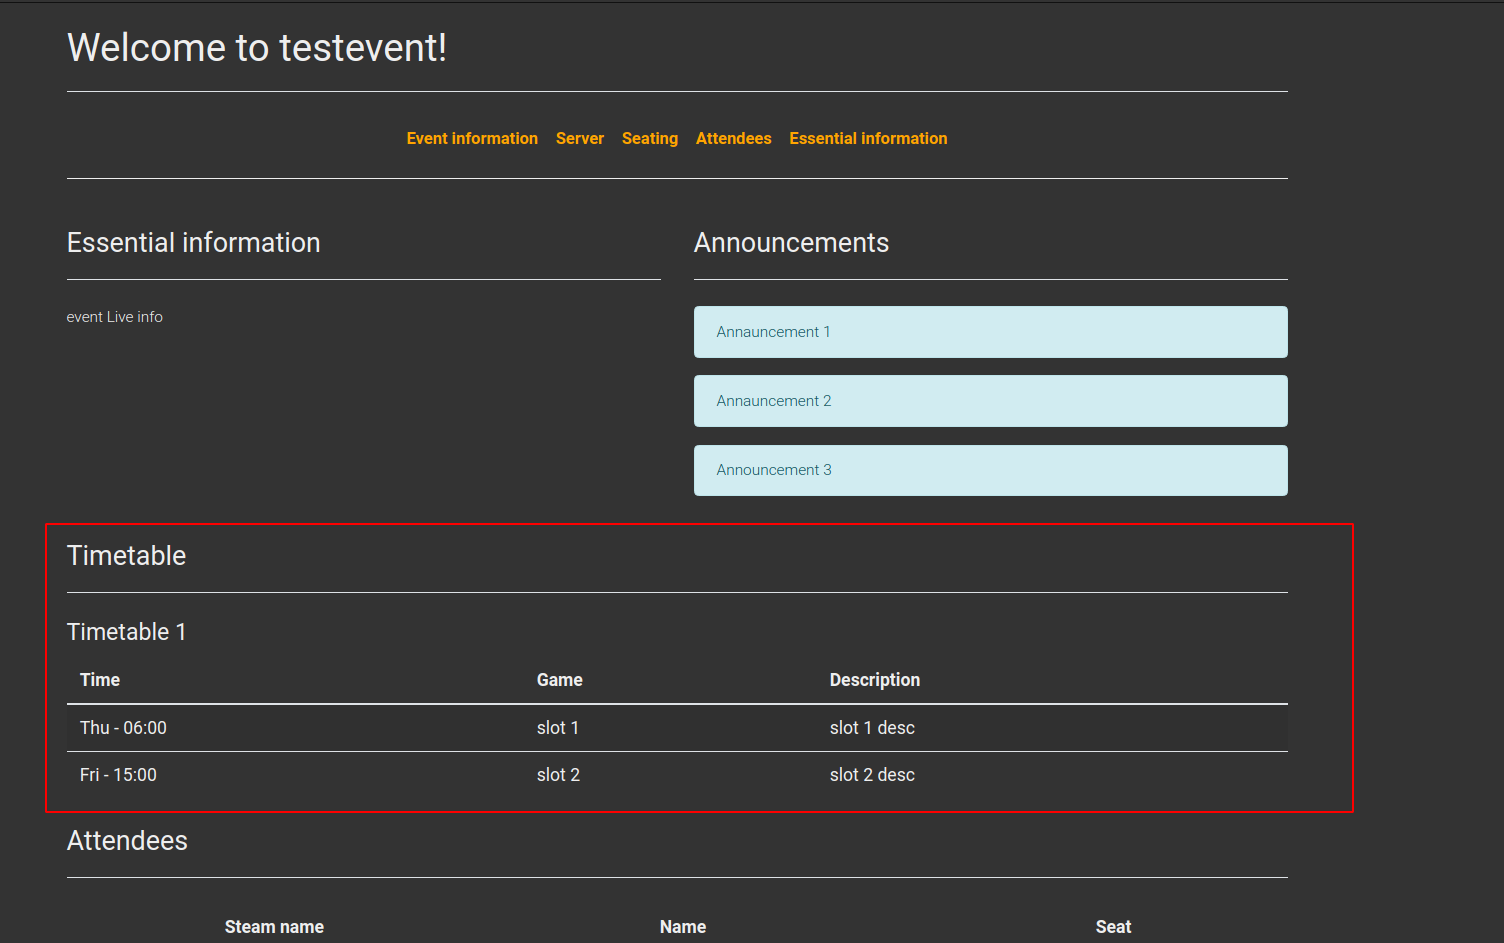
If you add multible timetables, they will be shown among themselves.